#夏日生活打卡季#
俗话说“春夏补阳”,夏天是补阳的好时节。六月渐入盛夏, 这时天气炎热, 不仅出汗多,人体消耗大,阳气亏损耗的阳气也比较多,而此时人们都会选择呆在空调房吹冷风,喝冷饮、吃西瓜等等, 这样更易损伤阳气。阳气是人体之根本,老一辈人总会强调, “夏养阳,保健康”,我们养生要顺应时节, 建议中老年人:多吃三种”养阳“食物,升阳驱寒,温阳护元气,提升抵抗力,身体棒,千万别心疼钱。 一起来看看吧。
https://s3.ssl.res.360kuai.com/static/ef8b90d3f65bc2be.svg"), auto; width: 676px; max-width: 100%; border-radius: 3px;" />
×
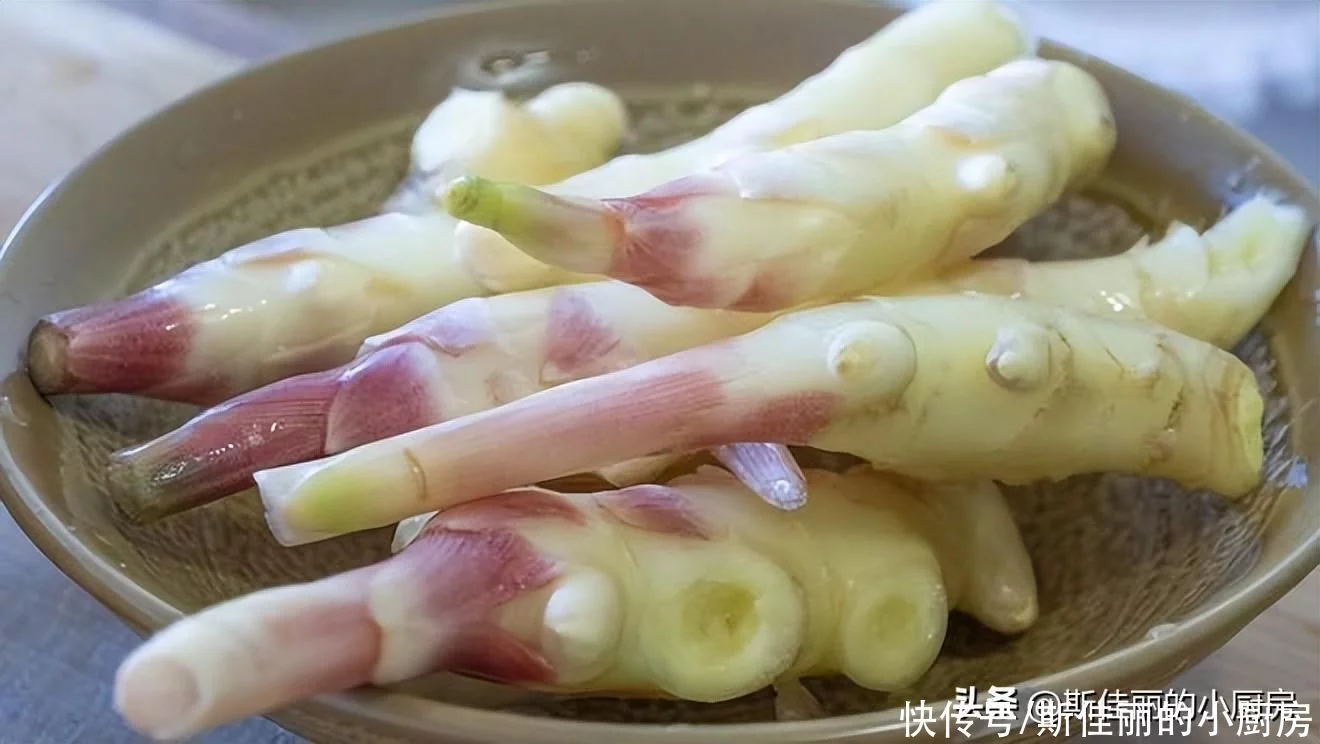
一、姜, 俗话说,“冬吃萝卜夏吃姜,不劳医生开药方”,吃姜能养脾胃的阳气,保脾胃不困于寒湿。姜作为养阳的“天选之子”,生姜辛温能化去寒湿,健运脾胃,既能升阳助阳,又具有温中祛寒的功效。
https://s3.ssl.res.360kuai.com/static/ef8b90d3f65bc2be.svg"), auto; width: 676px; max-width: 100%; border-radius: 3px;" />
×
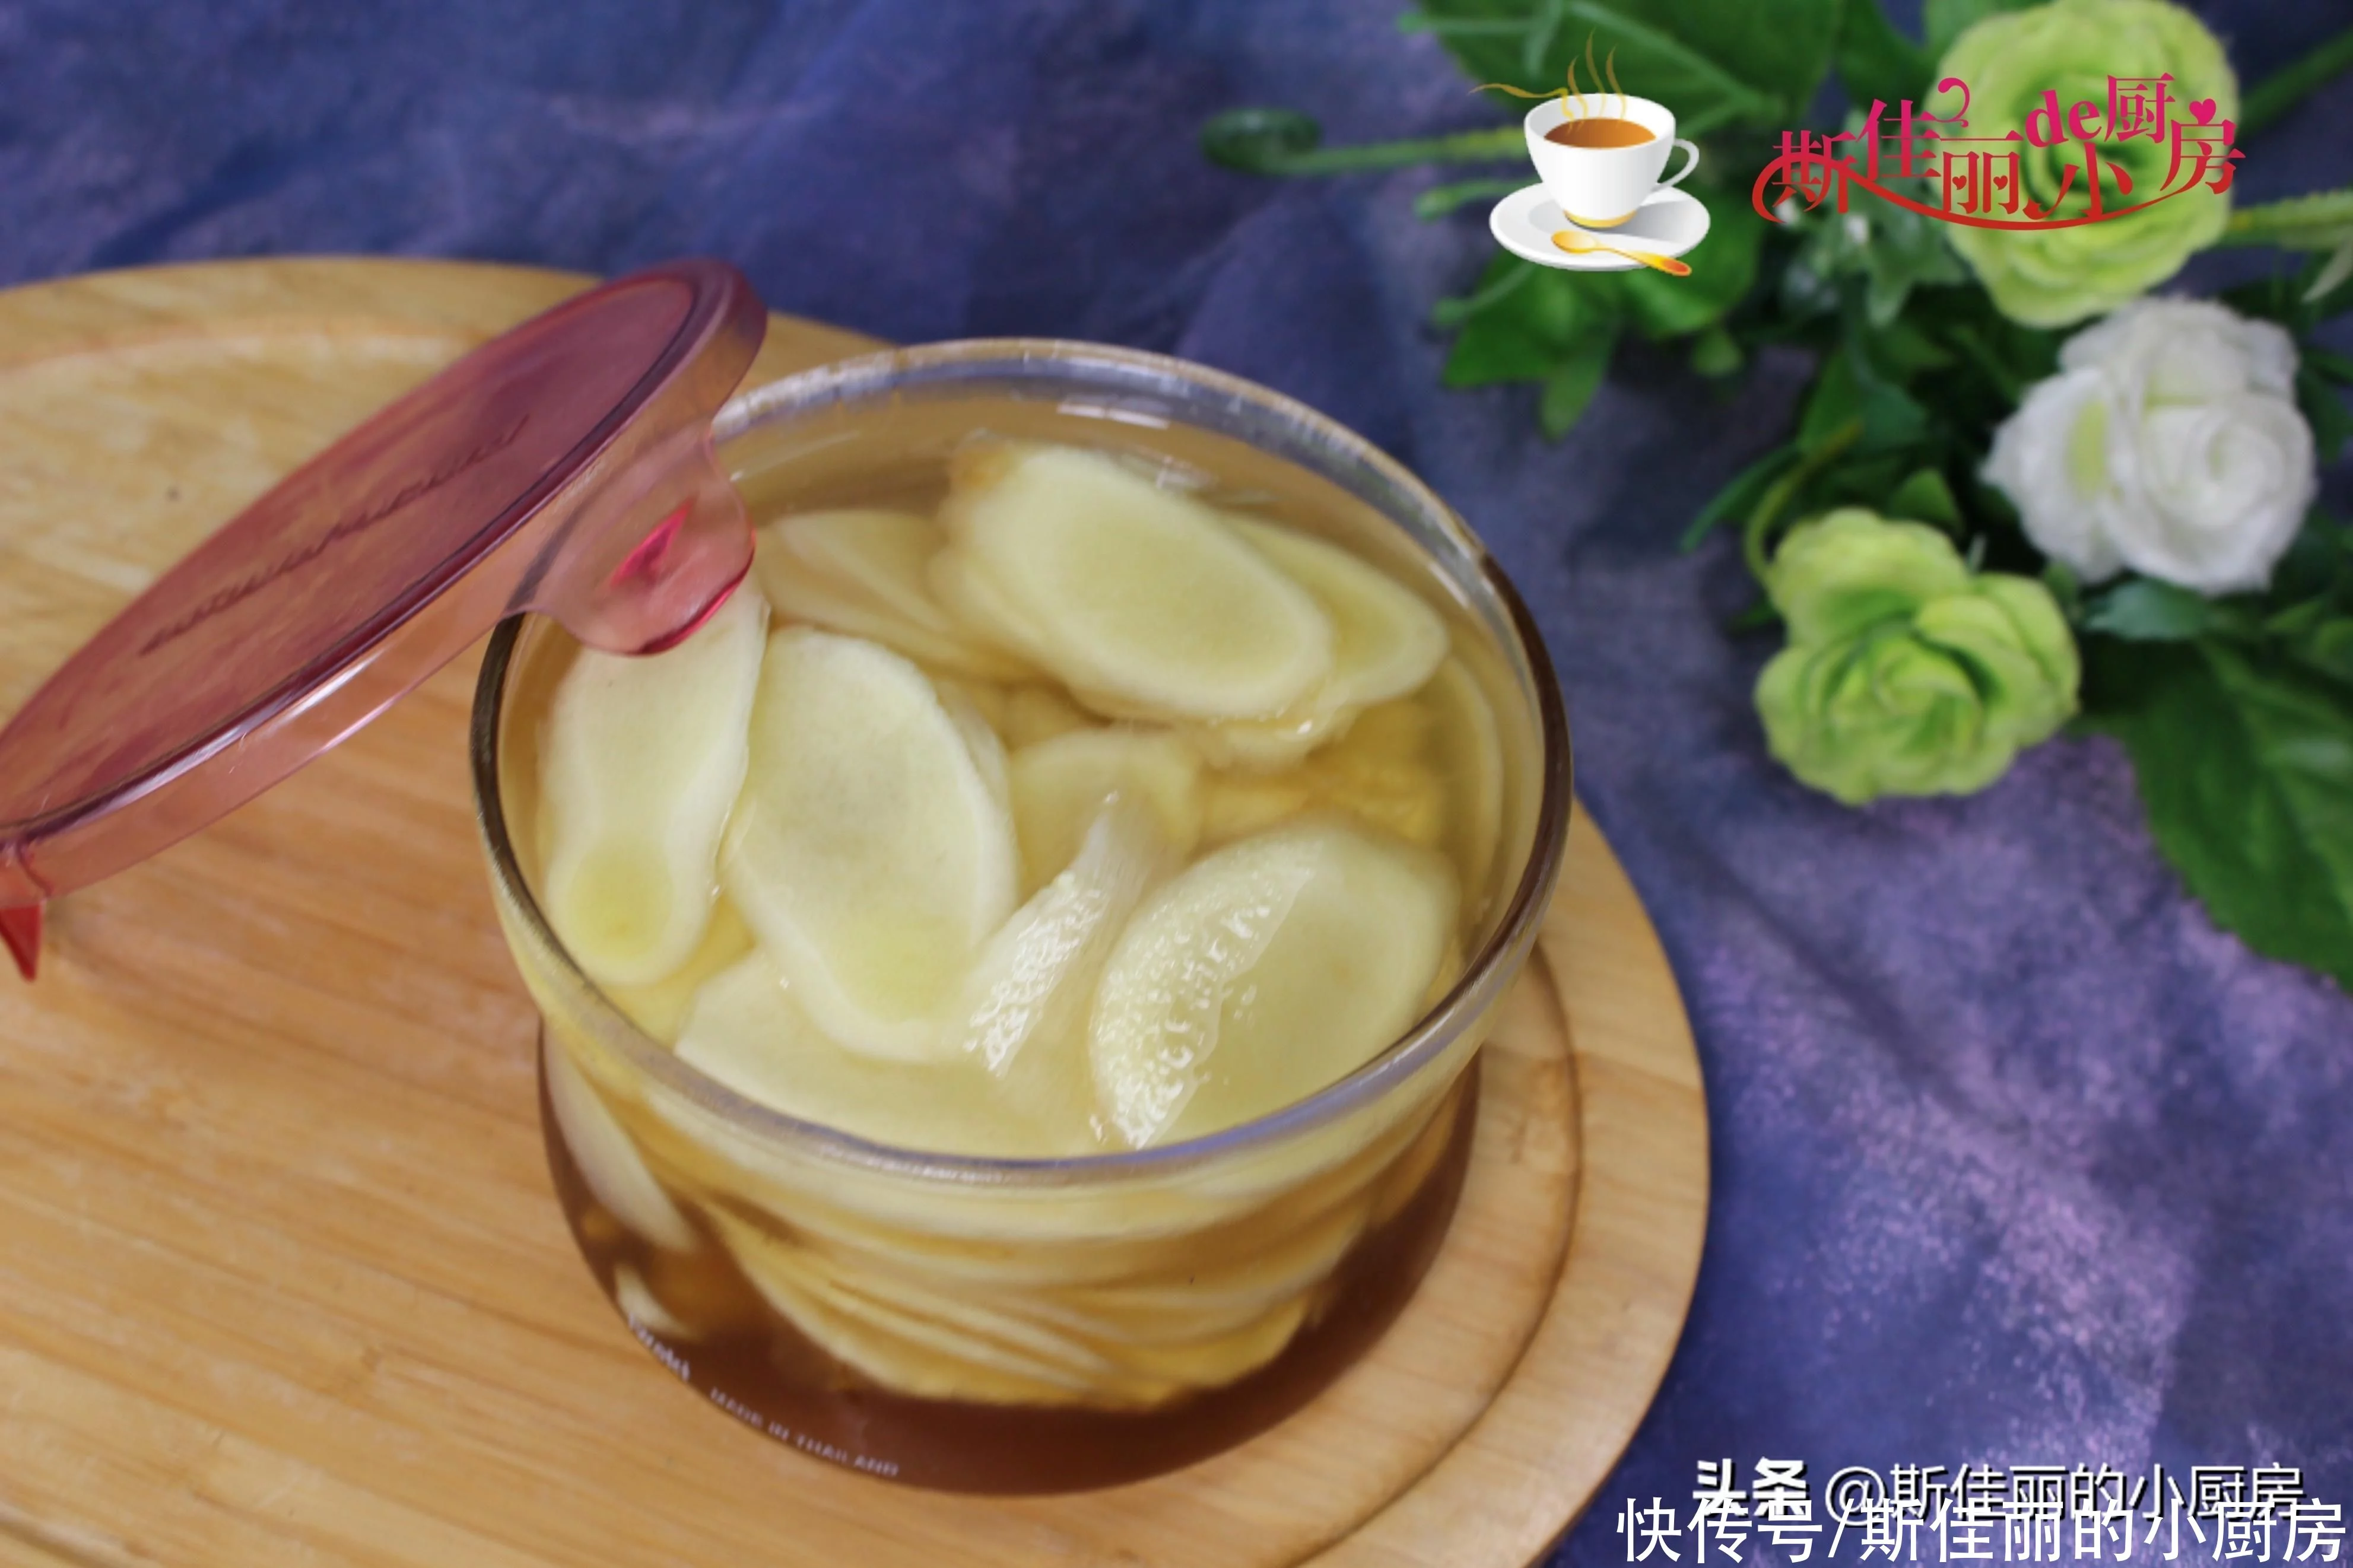
推荐菜谱【蜜渍仔姜】
原料: 仔姜 蜂蜜 盐
https://s3.ssl.res.360kuai.com/static/ef8b90d3f65bc2be.svg"), auto; width: 676px; max-width: 100%; border-radius: 3px;" />
×
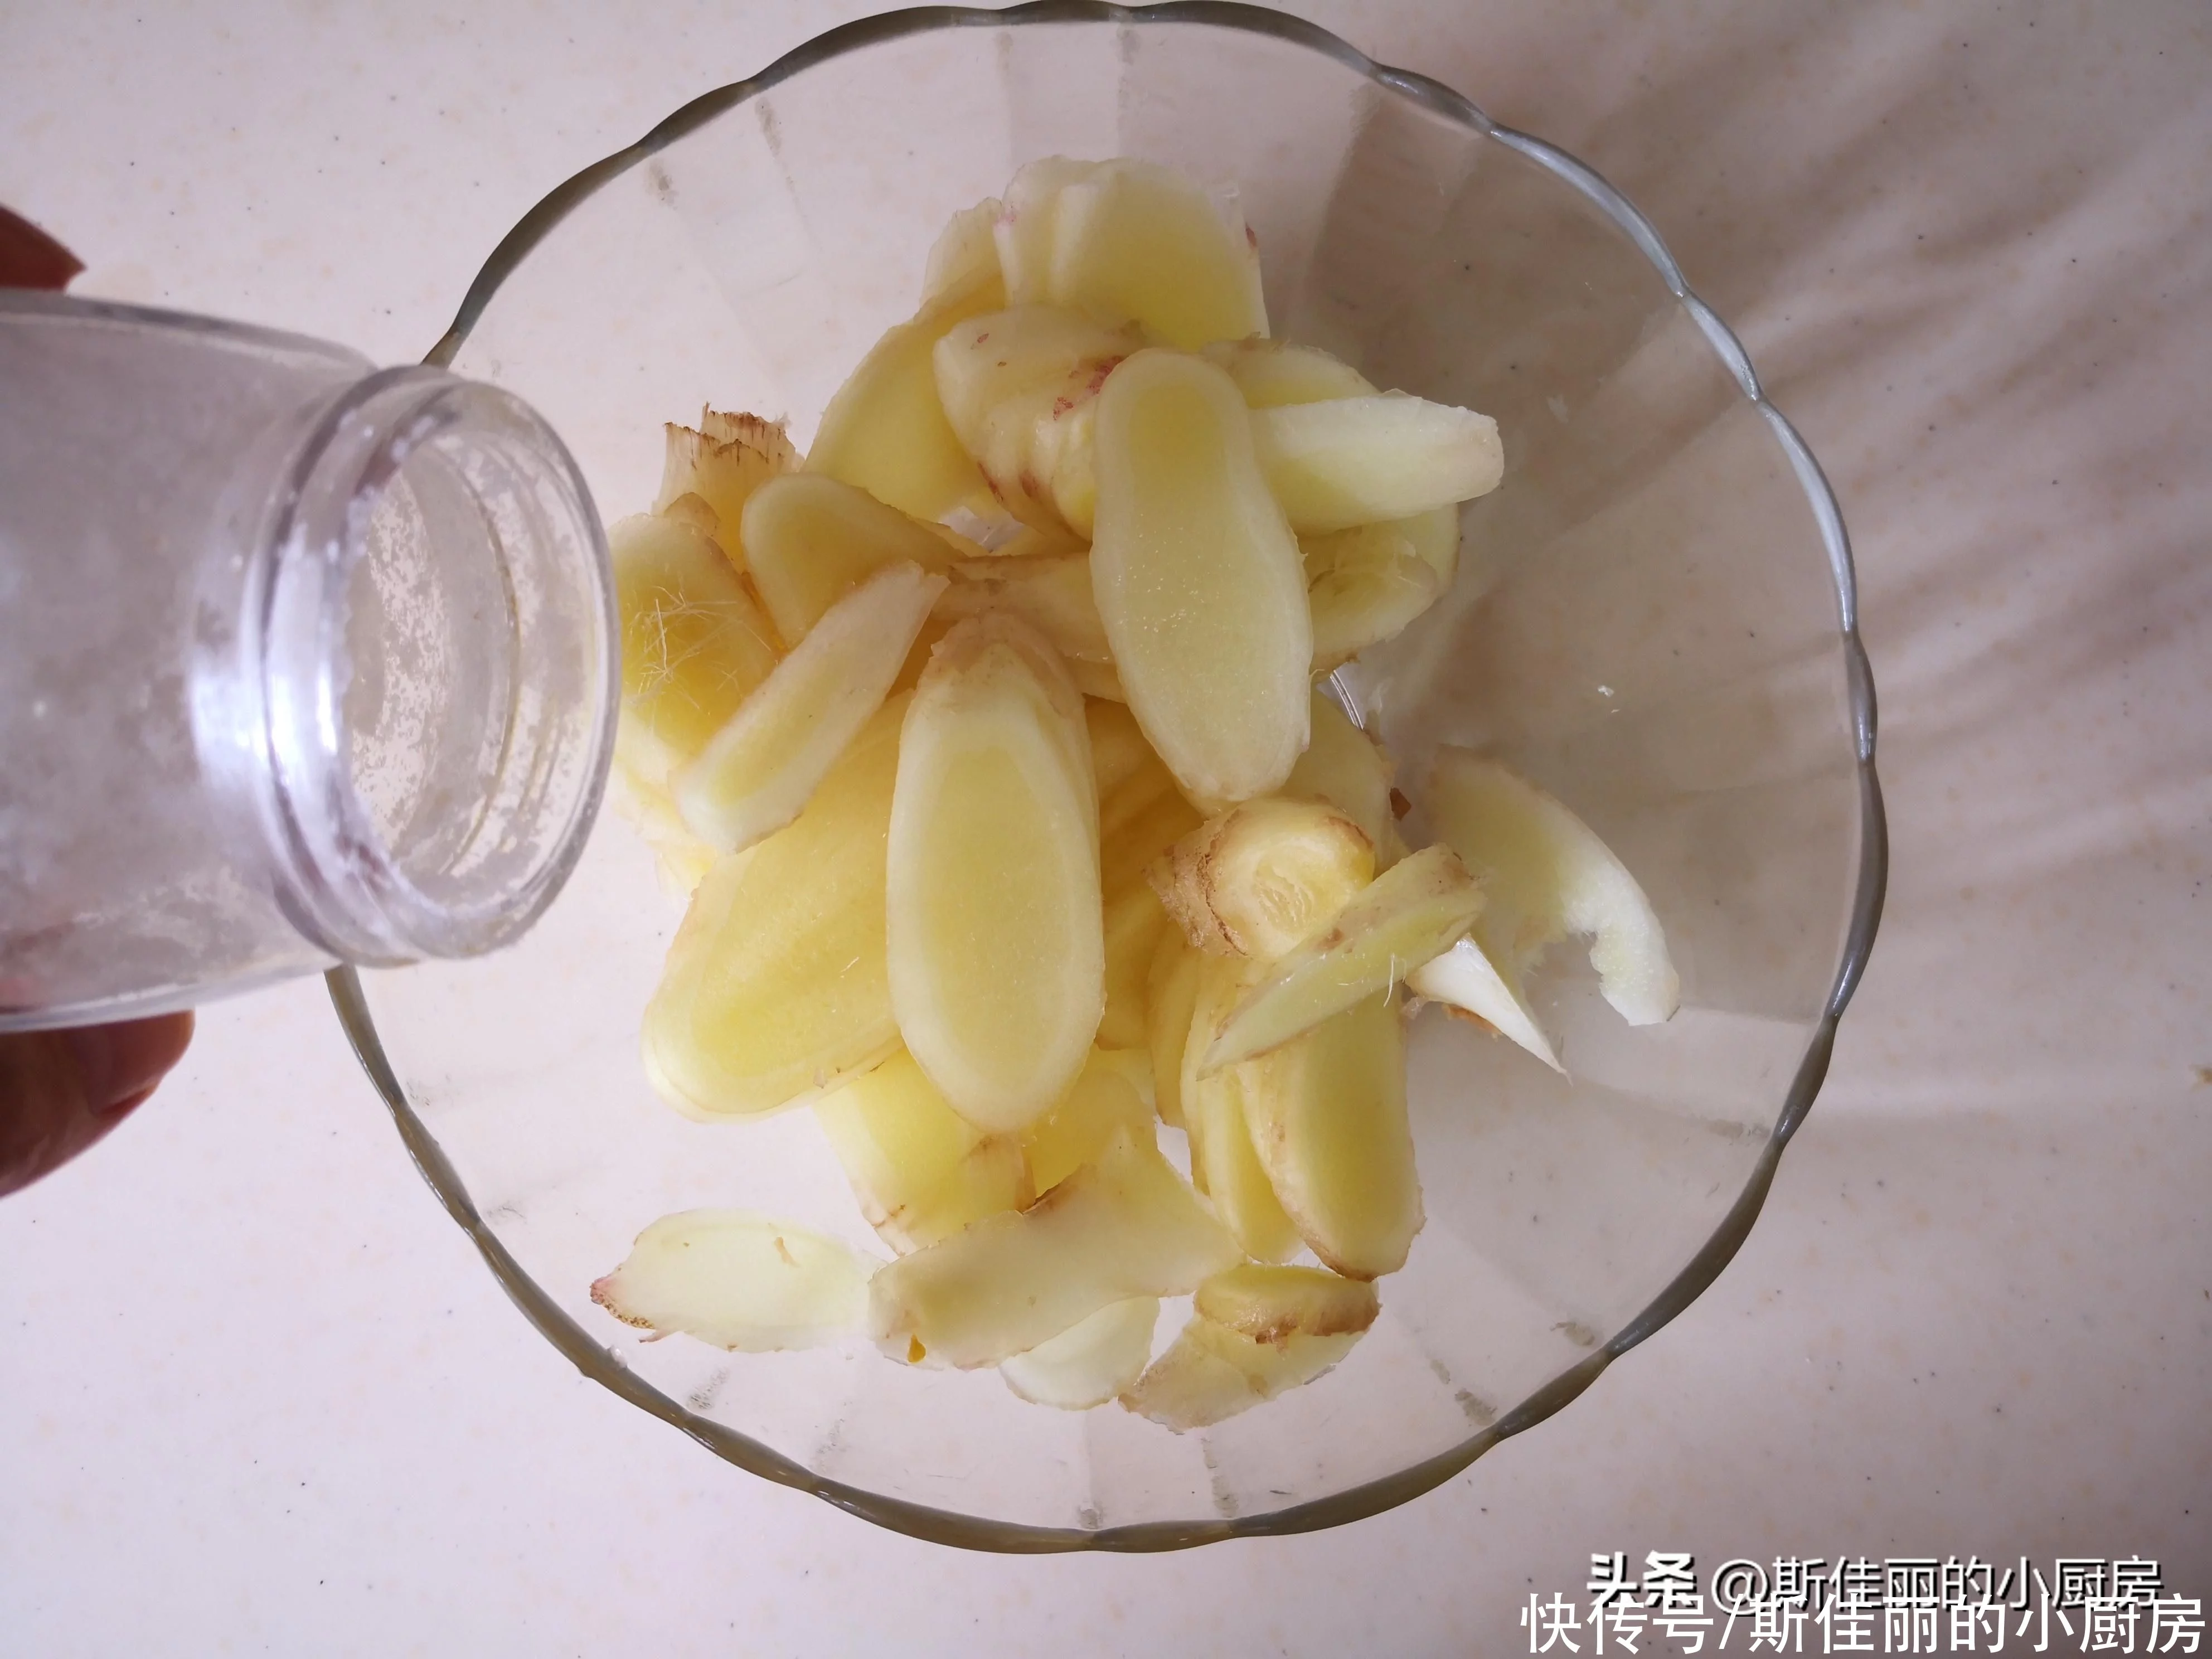
制作:1. 将仔姜切成片, 加入少许盐腌制一下;
https://s3.ssl.res.360kuai.com/static/ef8b90d3f65bc2be.svg"), auto; width: 676px; max-width: 100%; border-radius: 3px;" />
×
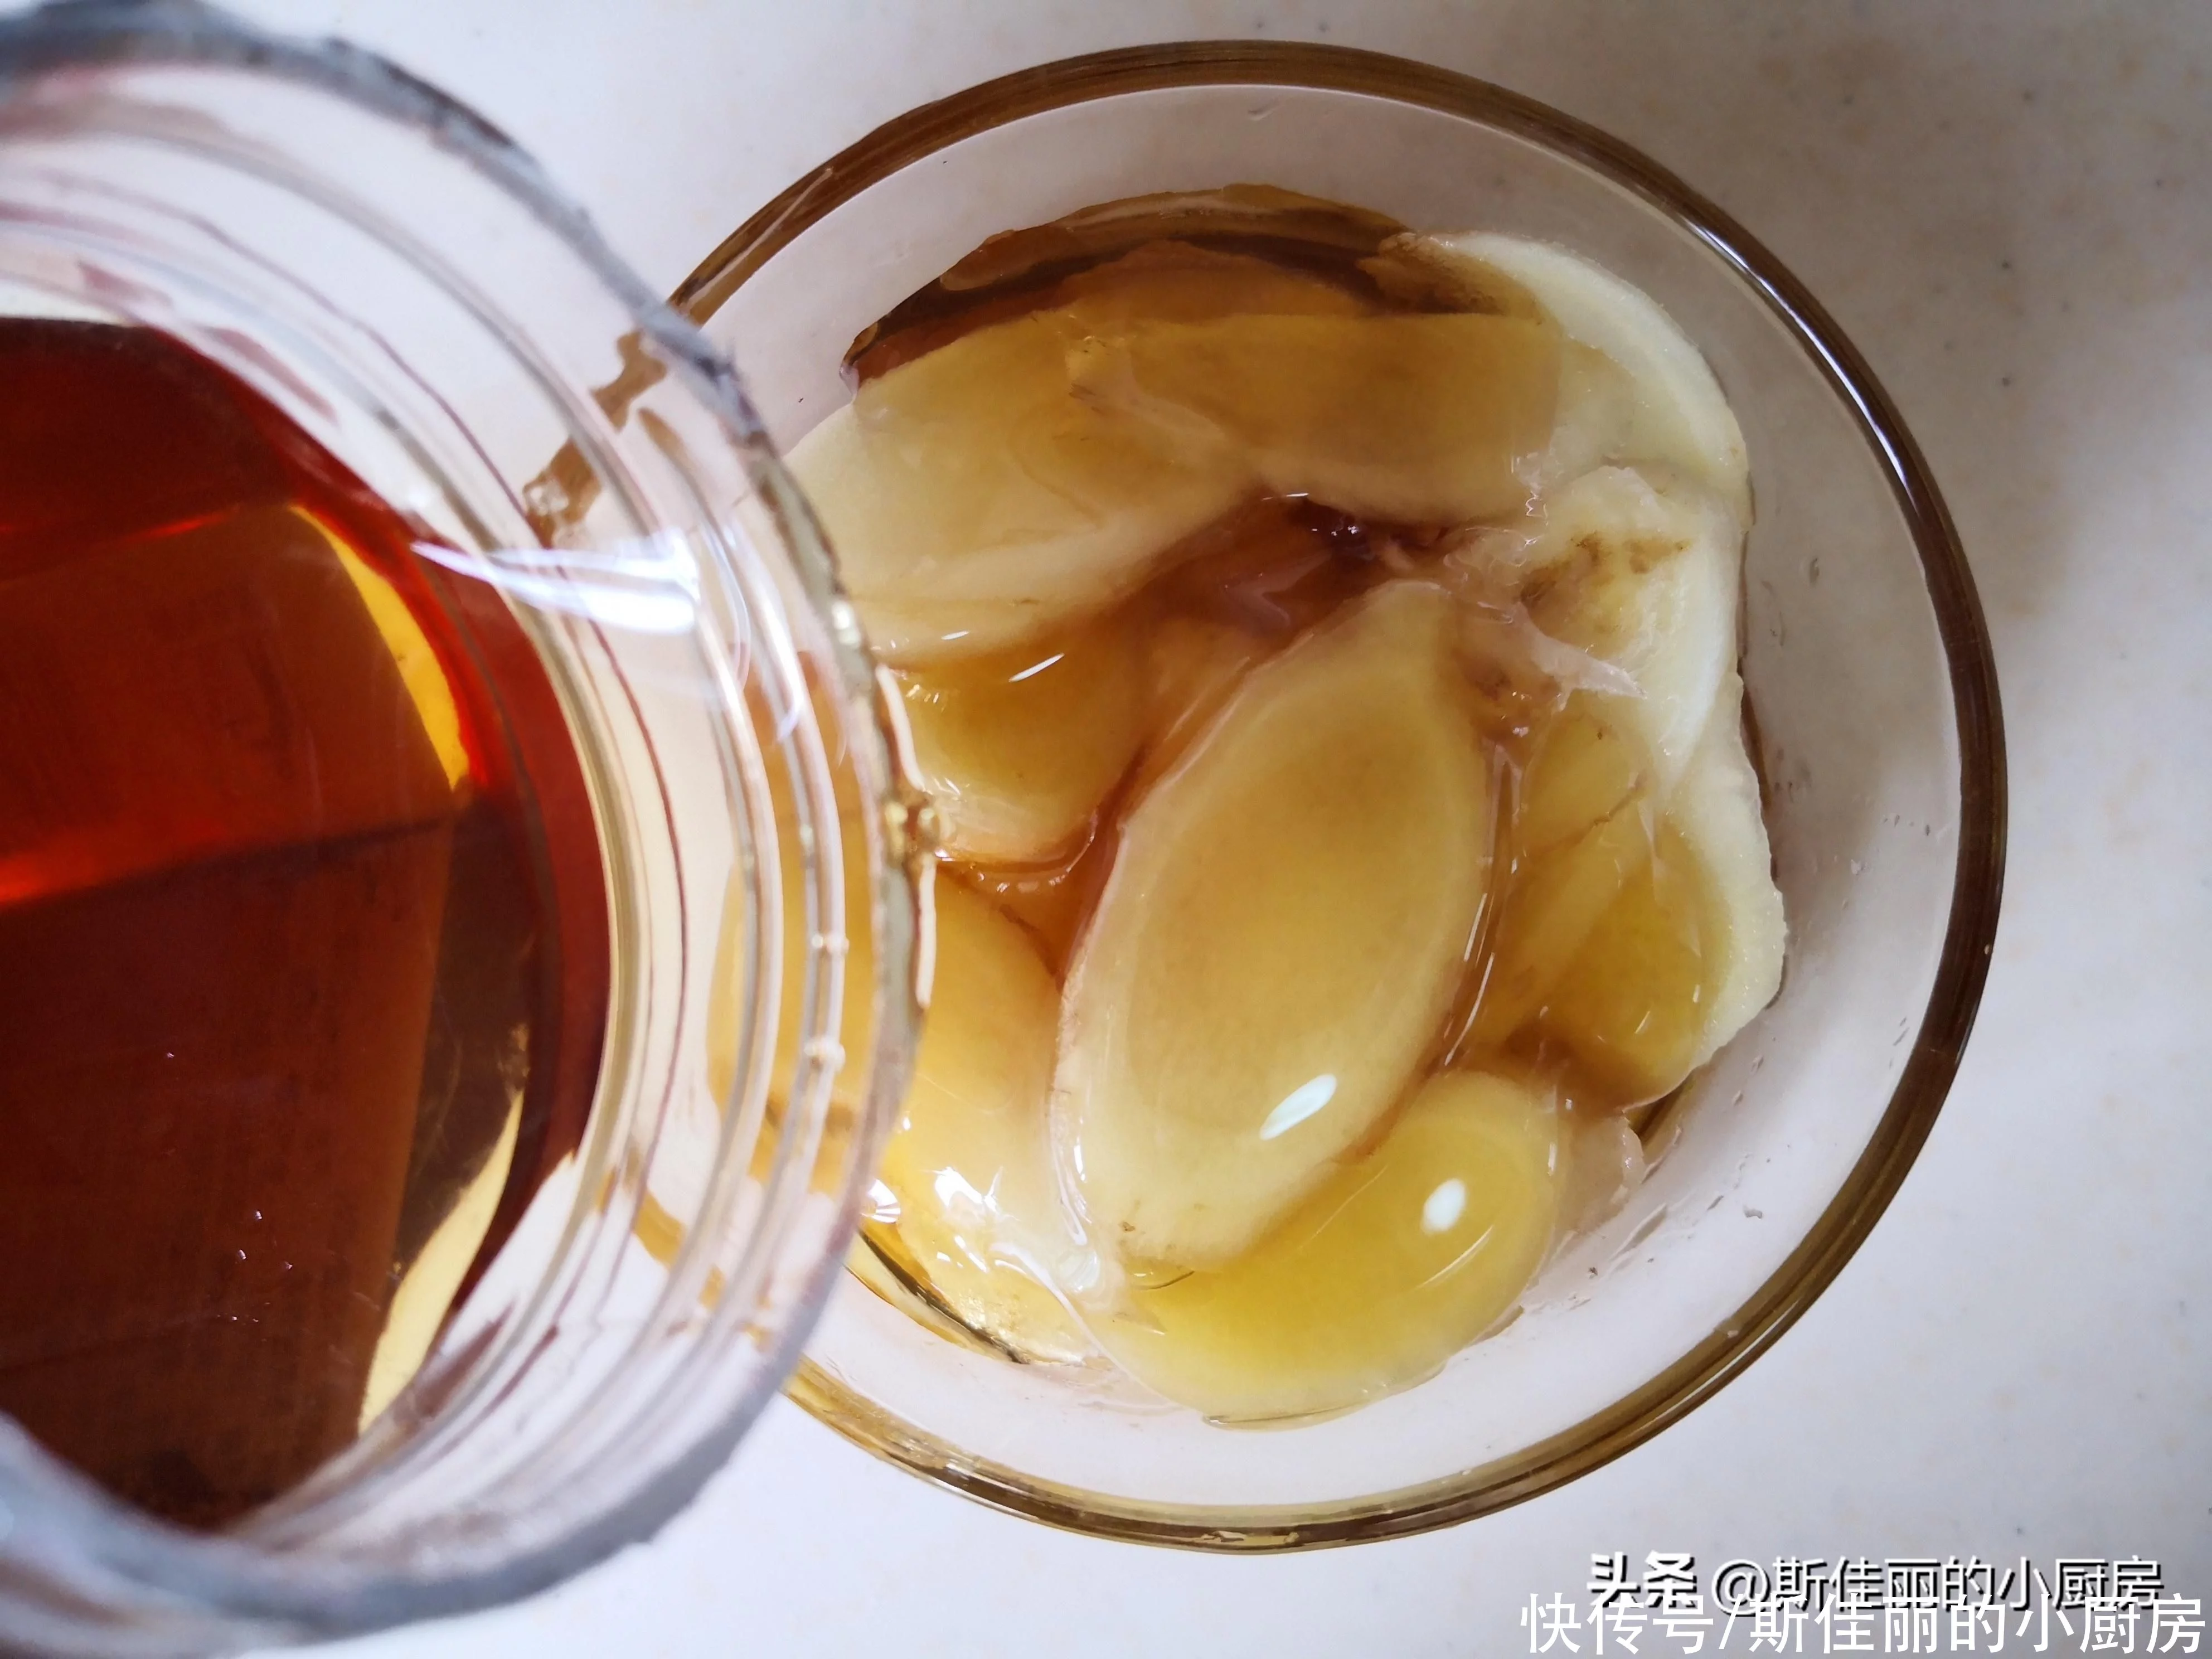
2. 将用盐腌制过的仔姜放入干净无油的容器中, 倒入适量的蜂蜜,注意蜂蜜一定要没过仔姜片;

https://s3.ssl.res.360kuai.com/static/ef8b90d3f65bc2be.svg"), auto; width: 676px; max-width: 100%; border-radius: 3px;" />
×
3. 将容器放入冰箱中一天以上。
https://s3.ssl.res.360kuai.com/static/ef8b90d3f65bc2be.svg"), auto; width: 676px; max-width: 100%; border-radius: 3px;" />
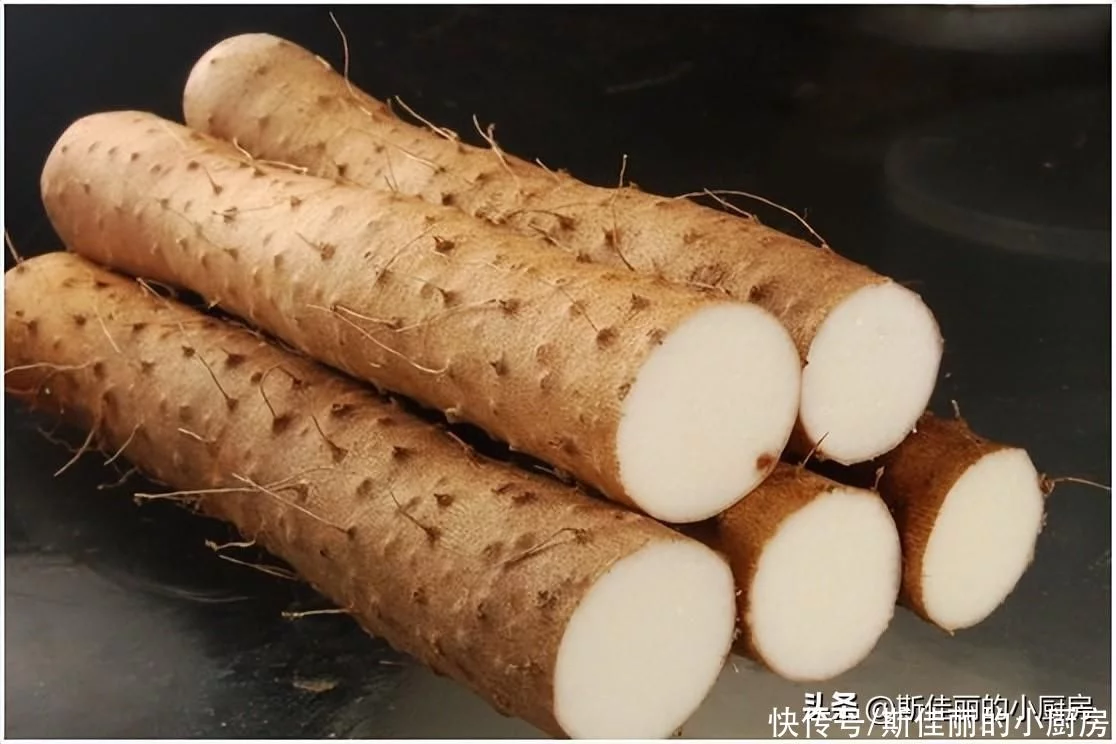
二、山药,山药是一种药食同源的食材, 山药性味甘、平,归脾、肺、肾经,能益气养阴,滋补脾胃,帮助消化、益肺止咳等功效。
https://s3.ssl.res.360kuai.com/static/ef8b90d3f65bc2be.svg"), auto; width: 676px; max-width: 100%; border-radius: 3px;" />
×
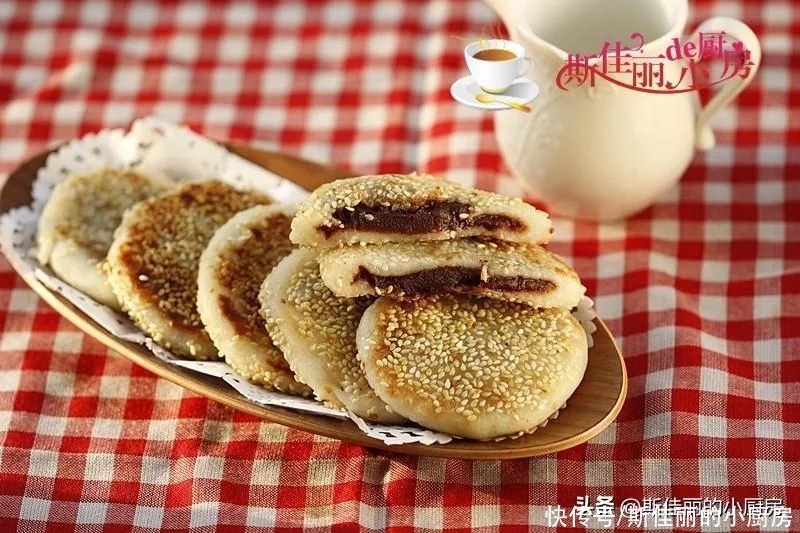
推荐菜谱【豆沙山药糯米饼】
原料: 铁棍山药 糯米粉 豆沙 糖 熟白芝麻 油

https://s3.ssl.res.360kuai.com/static/ef8b90d3f65bc2be.svg"), auto; width: 676px; max-width: 100%; border-radius: 3px;" />
制作:1. 将铁棍山药去皮后放入蒸锅中蒸熟;
https://s3.ssl.res.360kuai.com/static/ef8b90d3f65bc2be.svg"), auto; width: 676px; max-width: 100%; border-radius: 3px;" />
×
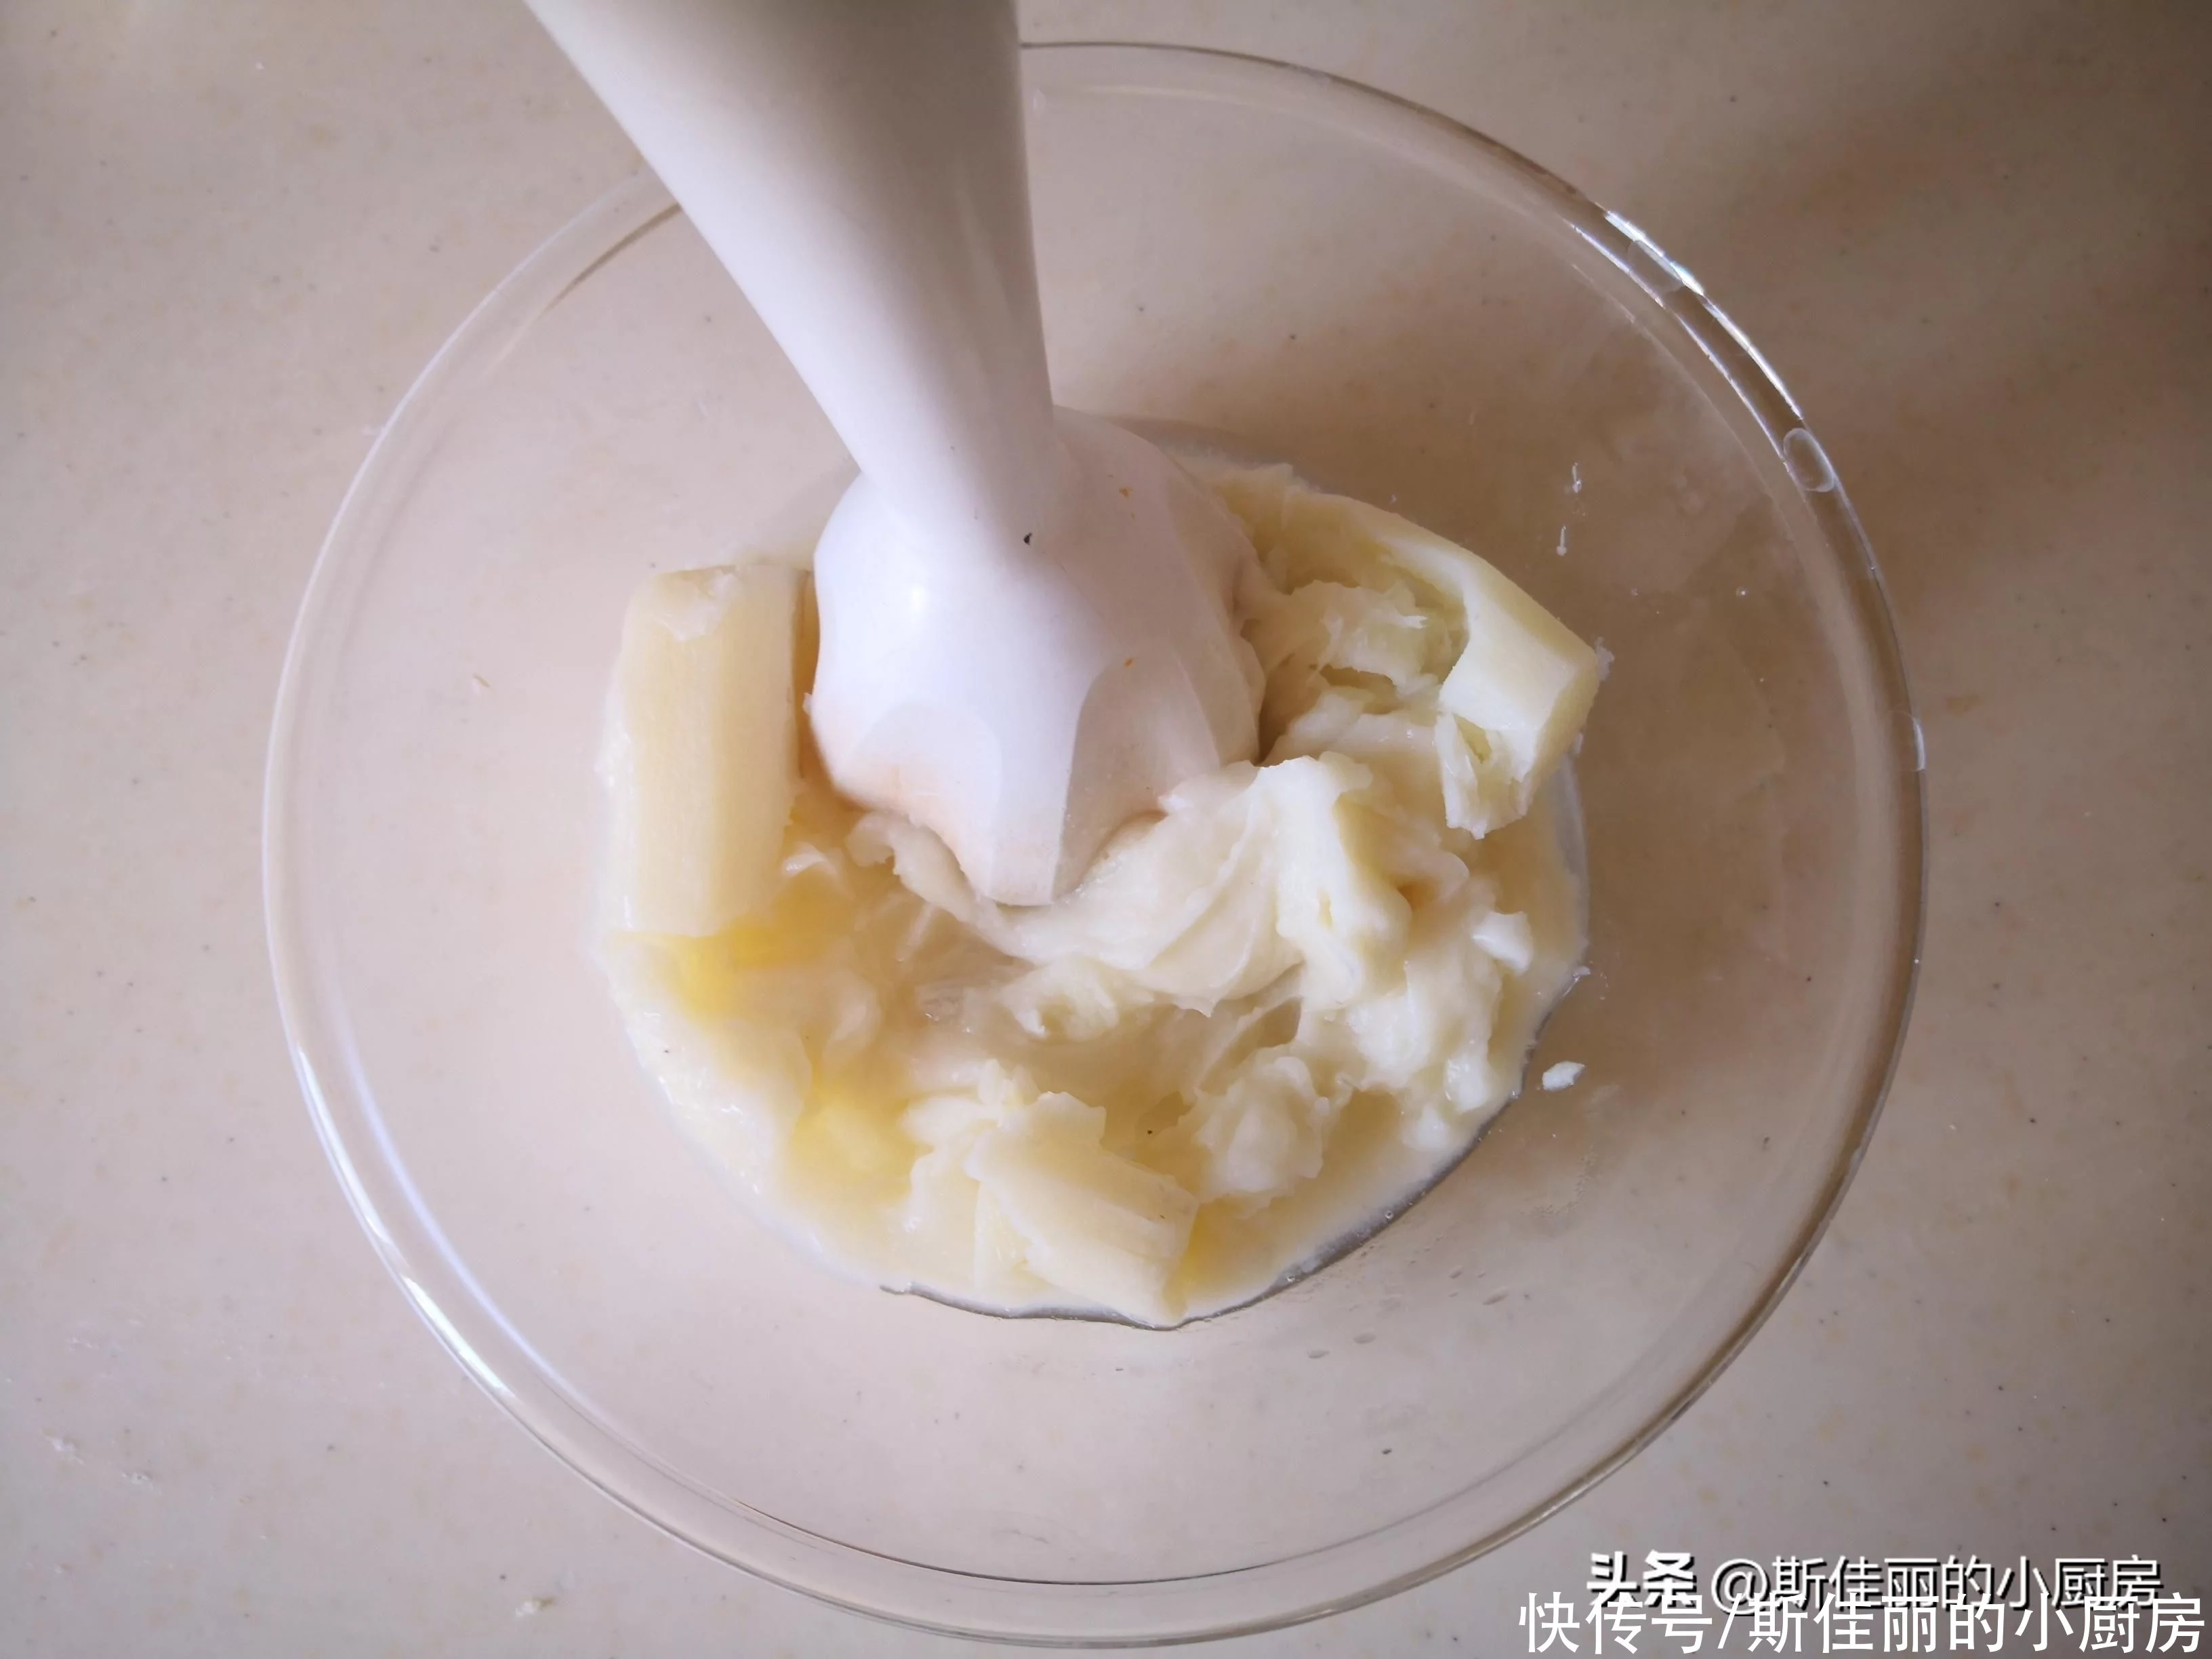
2. 将蒸熟的山药放入大碗中用电动搅拌器搅打成泥;
https://s3.ssl.res.360kuai.com/static/ef8b90d3f65bc2be.svg"), auto; width: 676px; max-width: 100%; border-radius: 3px;" />
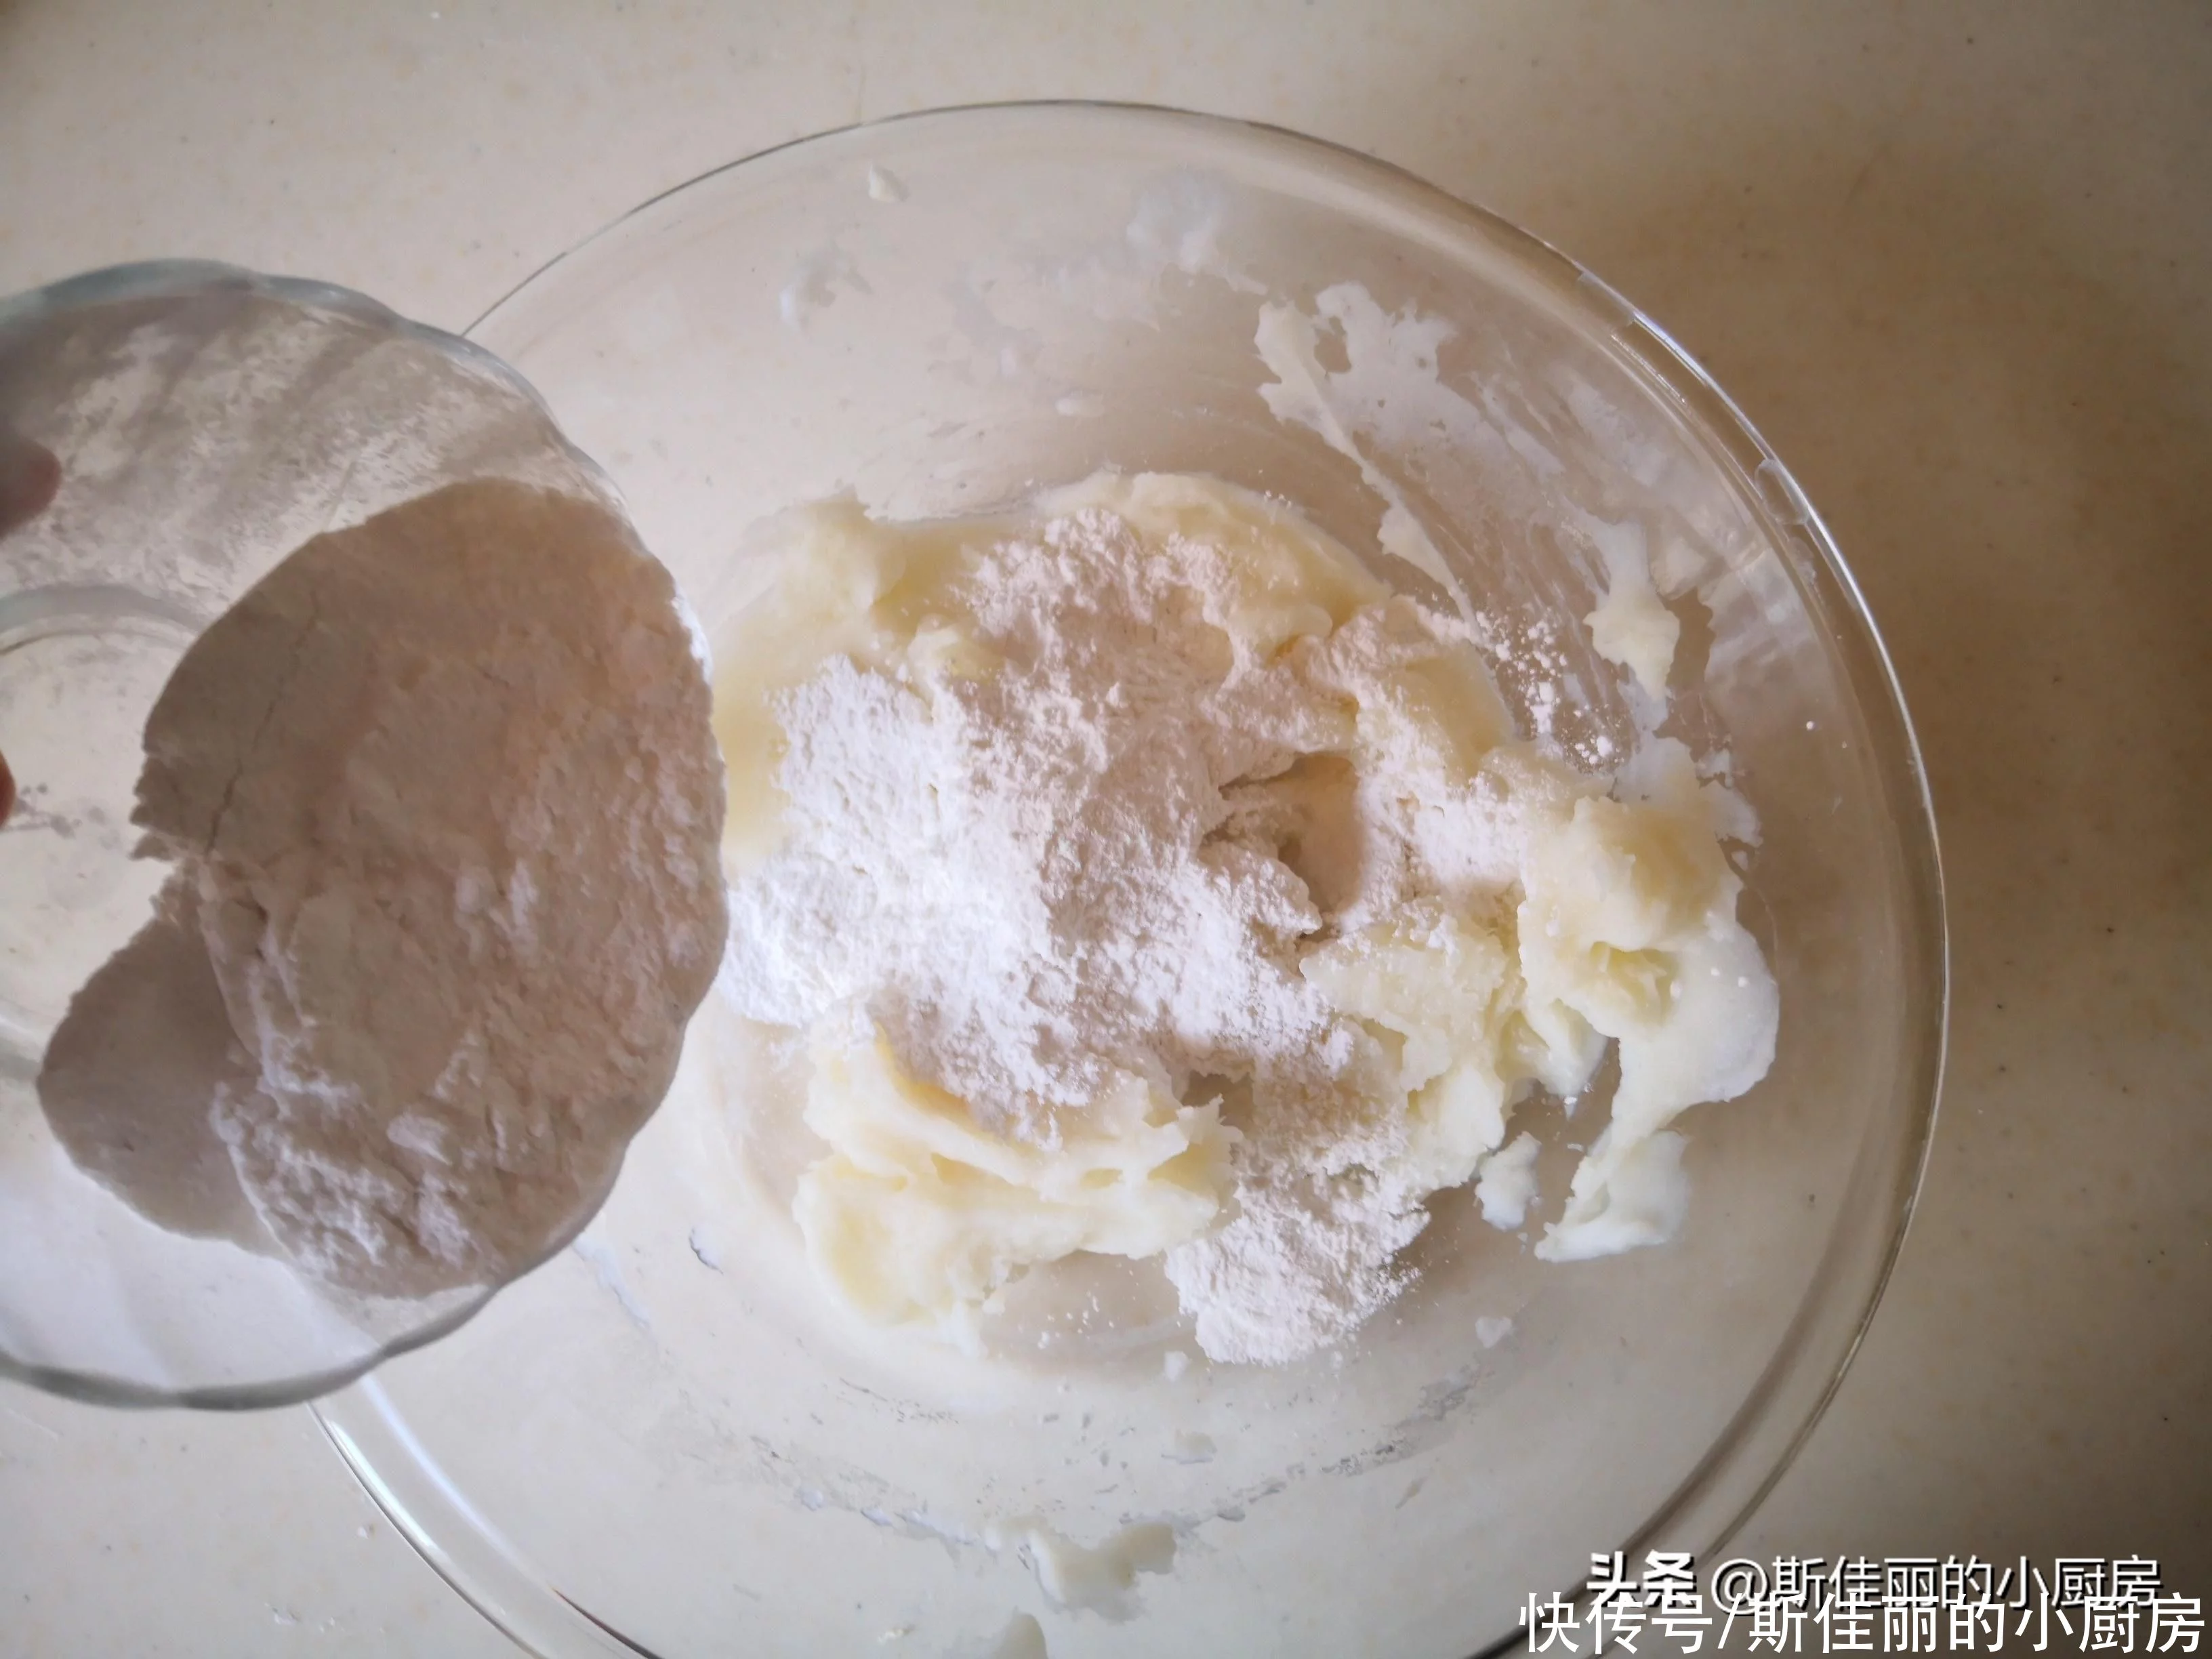
3. 趁热加入少许白糖拌均匀,待到山药泥微微凉时加入少许糯米粉,和成光滑的山药糯米面团;
https://s3.ssl.res.360kuai.com/static/ef8b90d3f65bc2be.svg"), auto; width: 676px; max-width: 100%; border-radius: 3px;" />
×
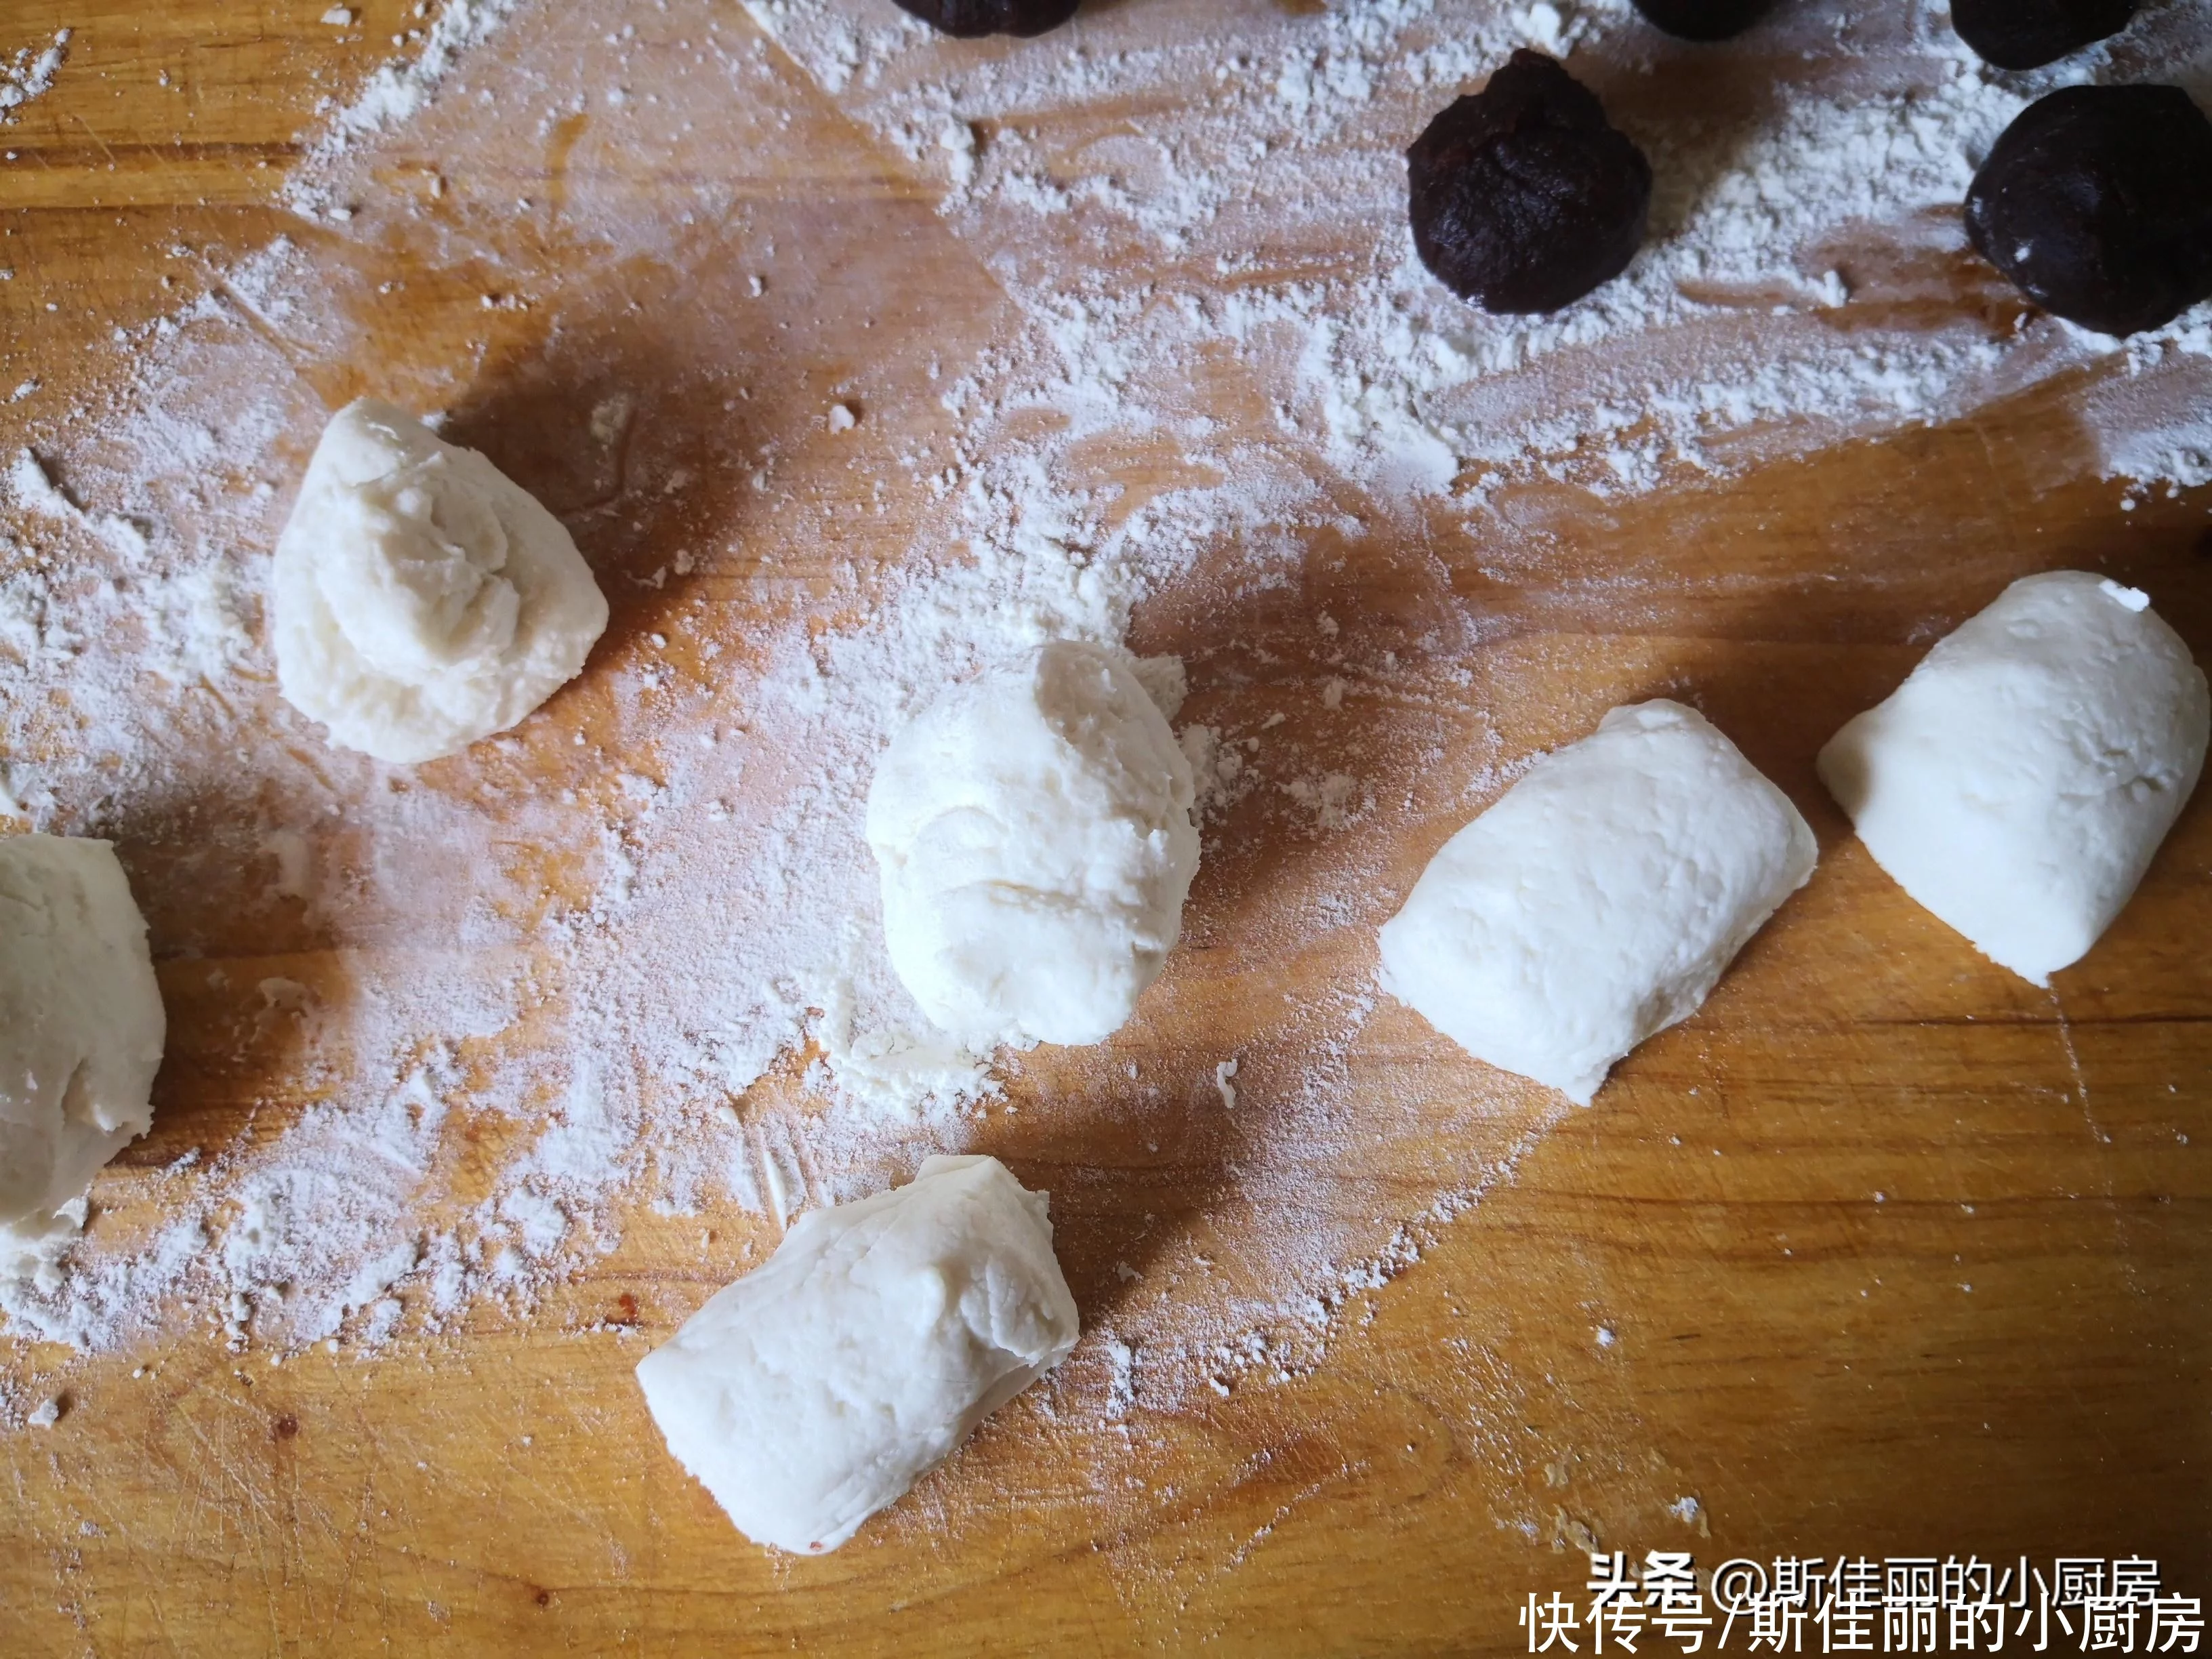
4. 将准备好的山药面团和熟豆沙分别分割成相同大小面团, 搓成球备用;
https://s3.ssl.res.360kuai.com/static/ef8b90d3f65bc2be.svg"), auto; width: 676px; max-width: 100%; border-radius: 3px;" />
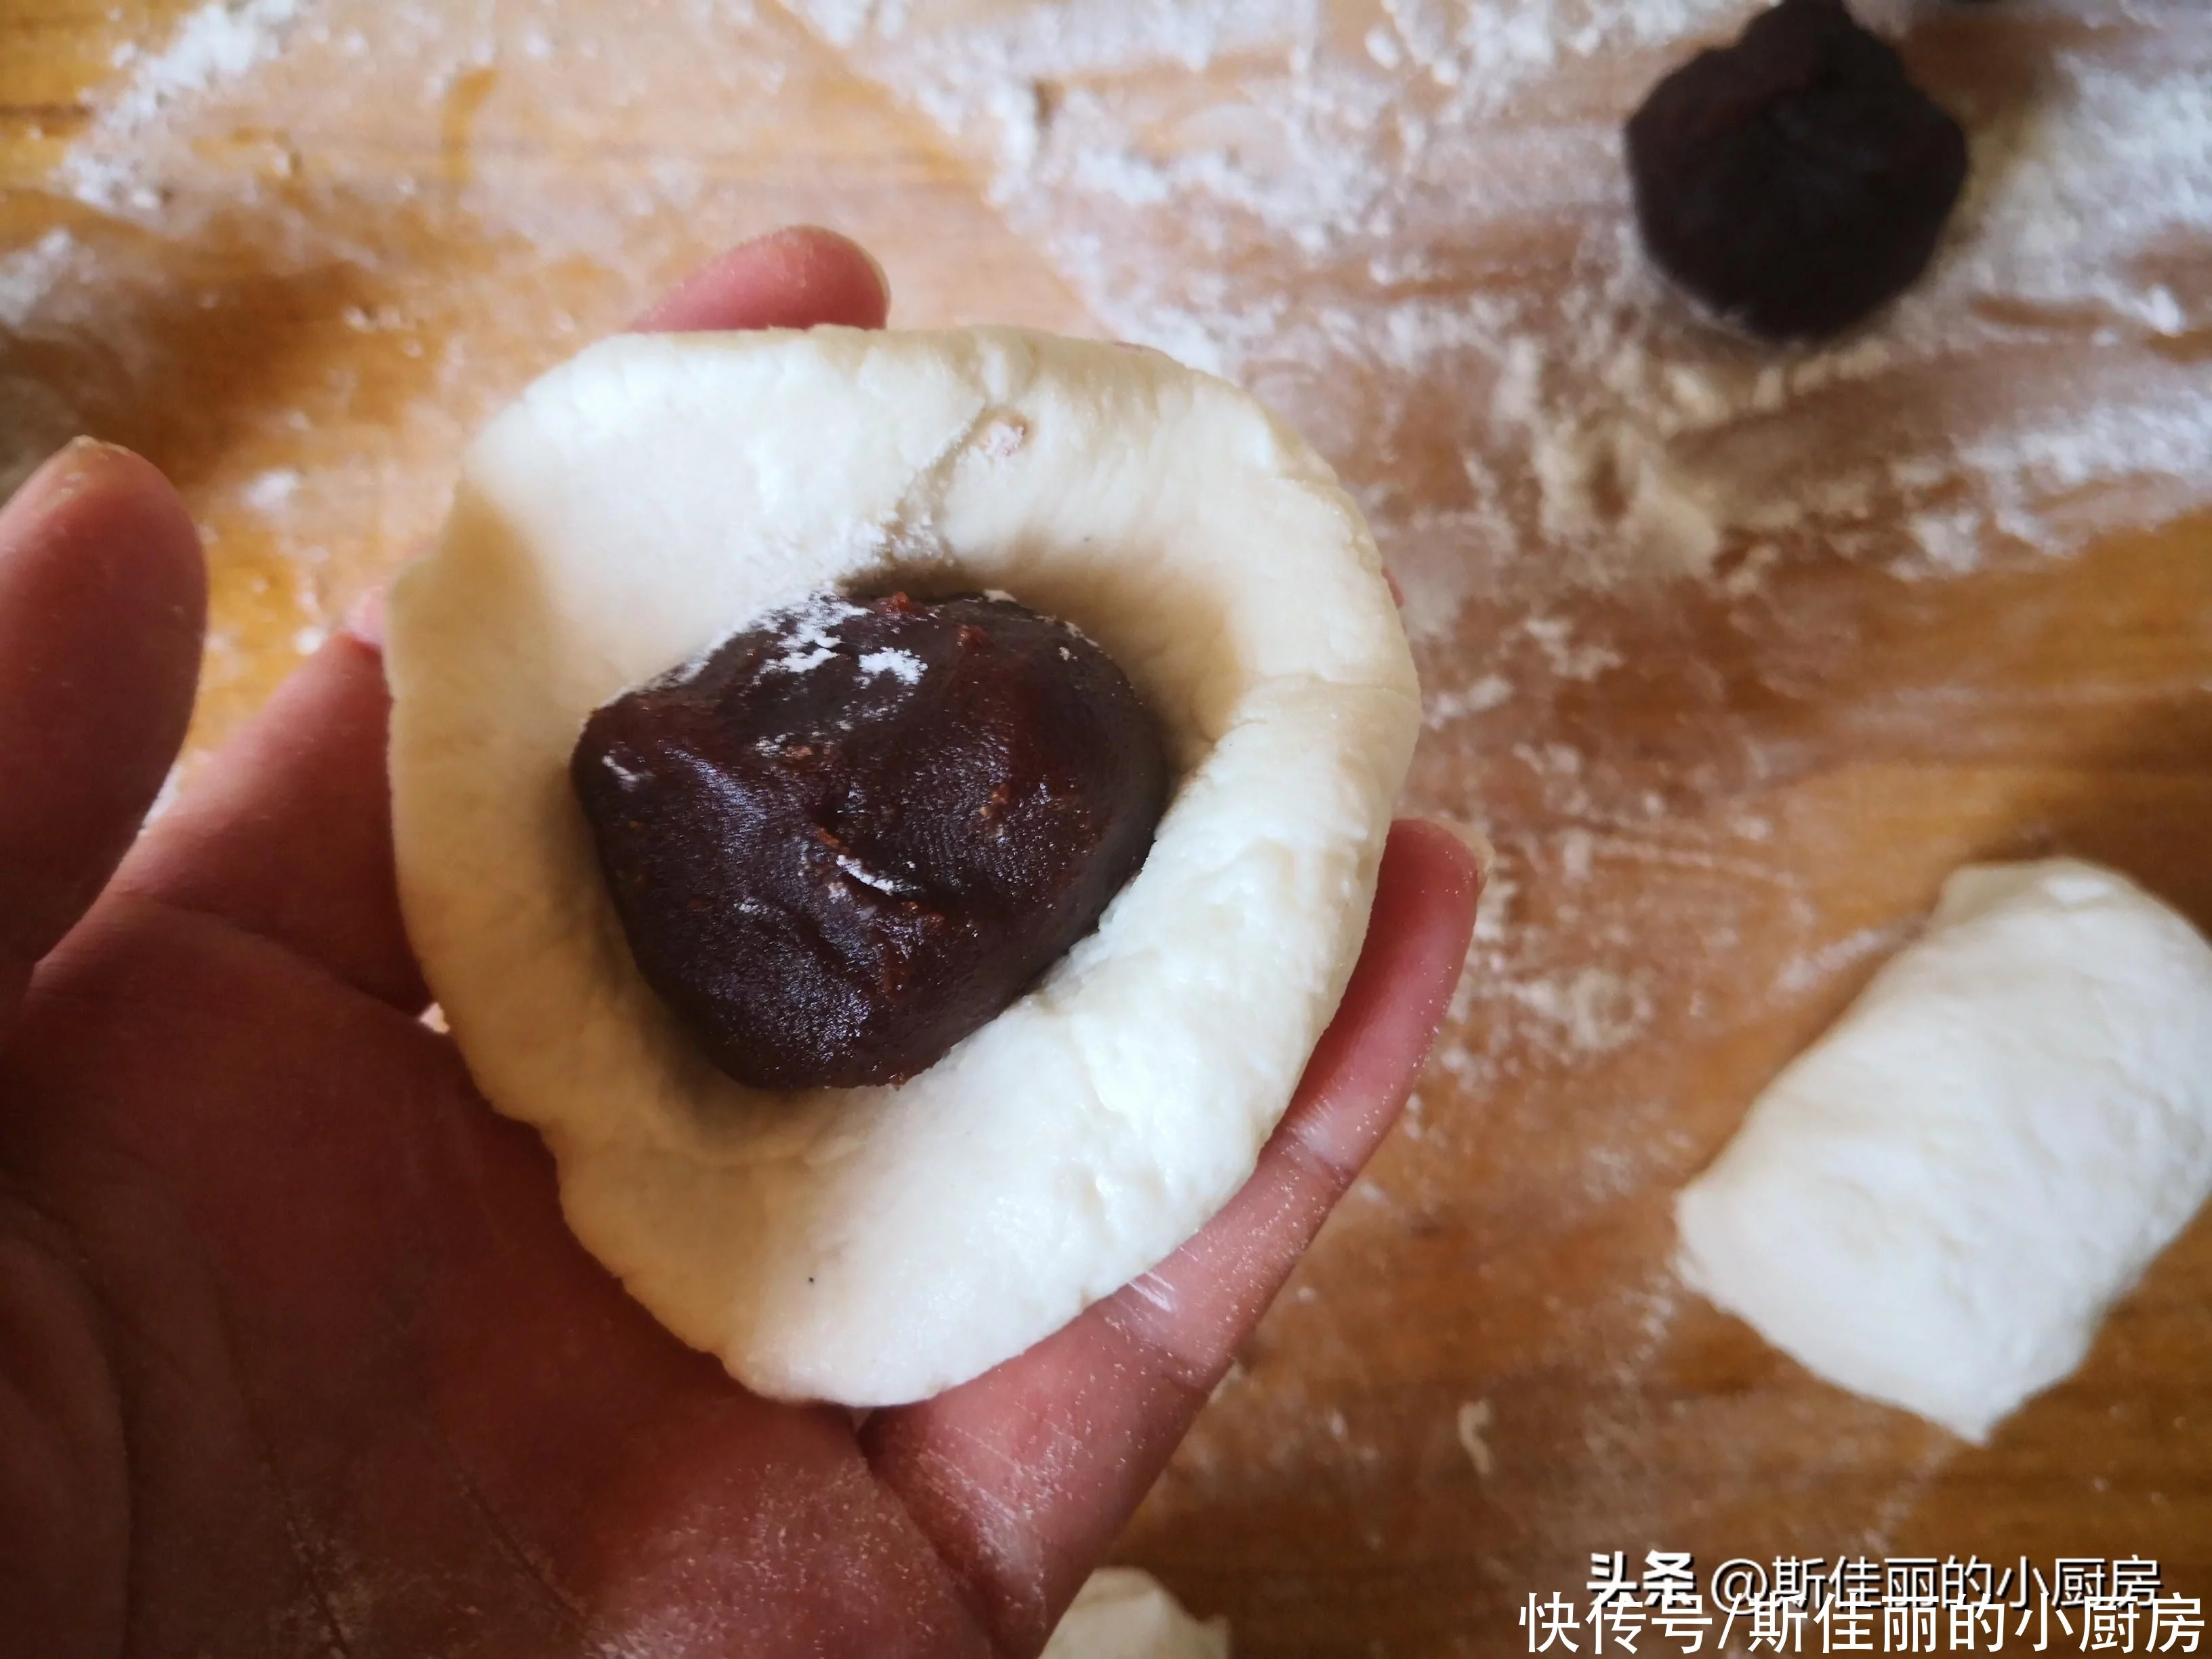
5. 将糯米面团按压成圆片后包入豆沙球,包起来后搓成球,将其按压成饼,
https://s3.ssl.res.360kuai.com/static/ef8b90d3f65bc2be.svg"), auto; width: 676px; max-width: 100%; border-radius: 3px;" />
×
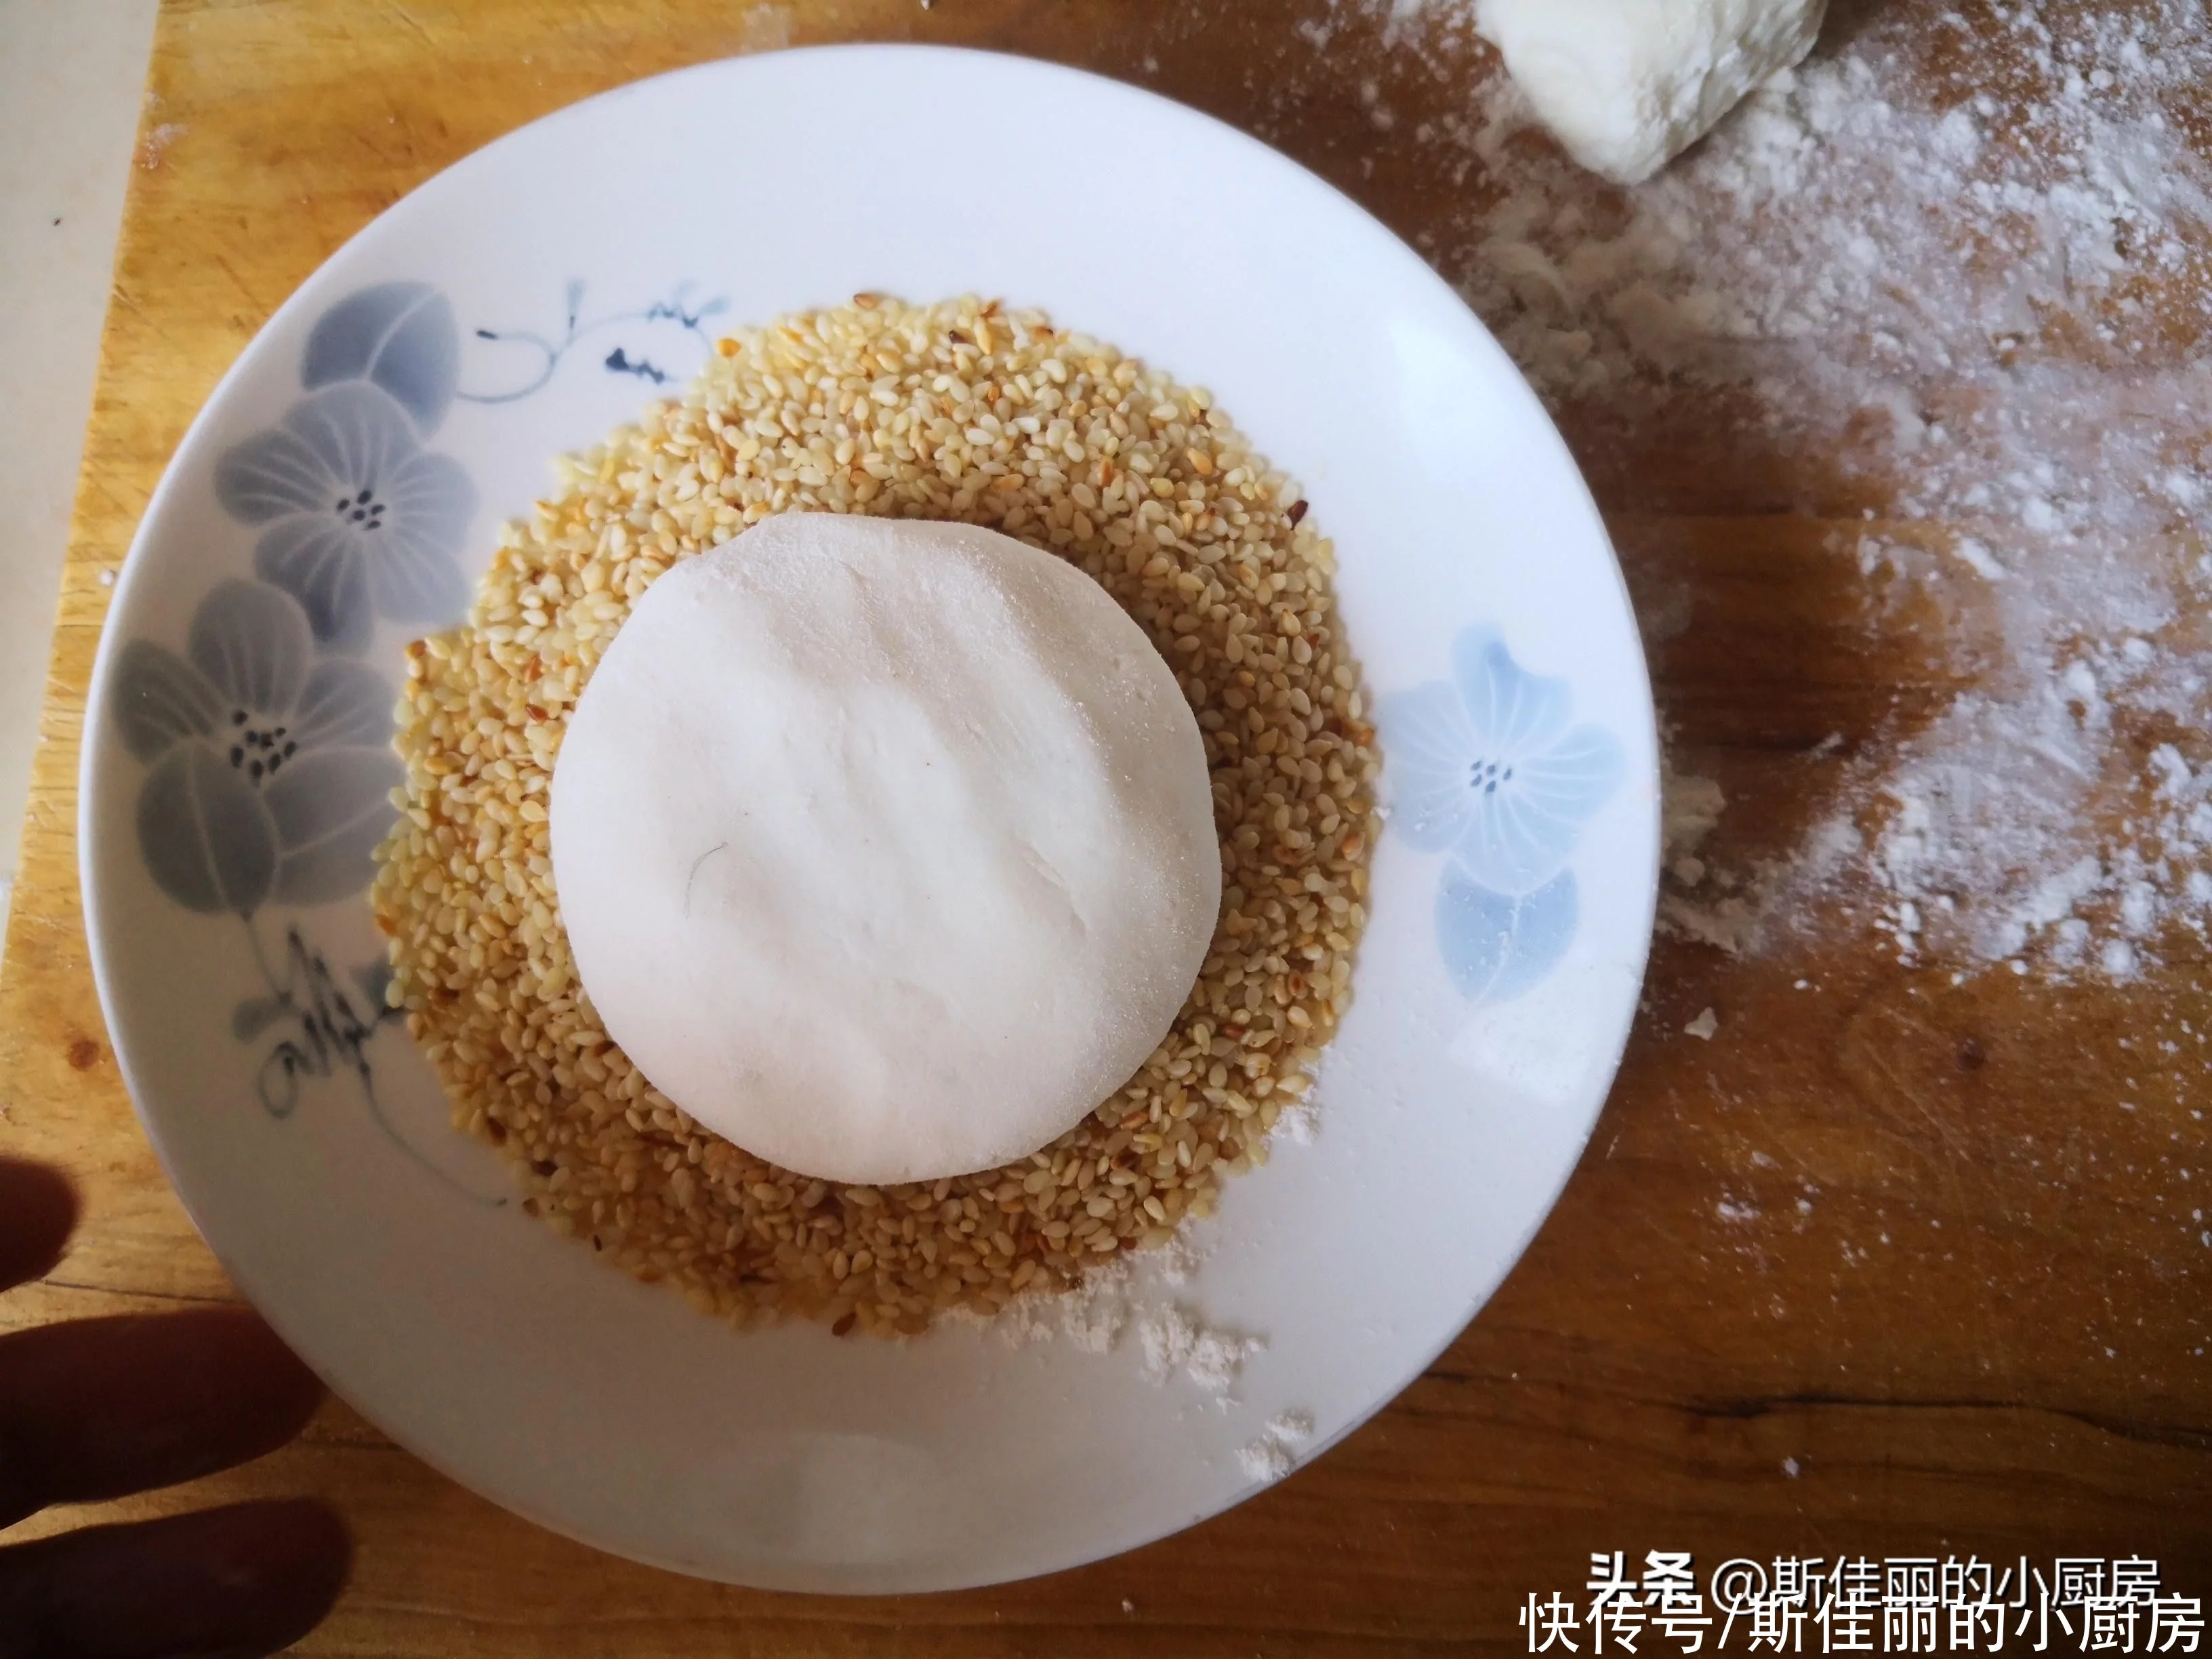
6. 放入熟白芝麻中双面按压让山药饼沾上白芝麻;
https://s3.ssl.res.360kuai.com/static/ef8b90d3f65bc2be.svg"), auto; width: 676px; max-width: 100%; border-radius: 3px;" />
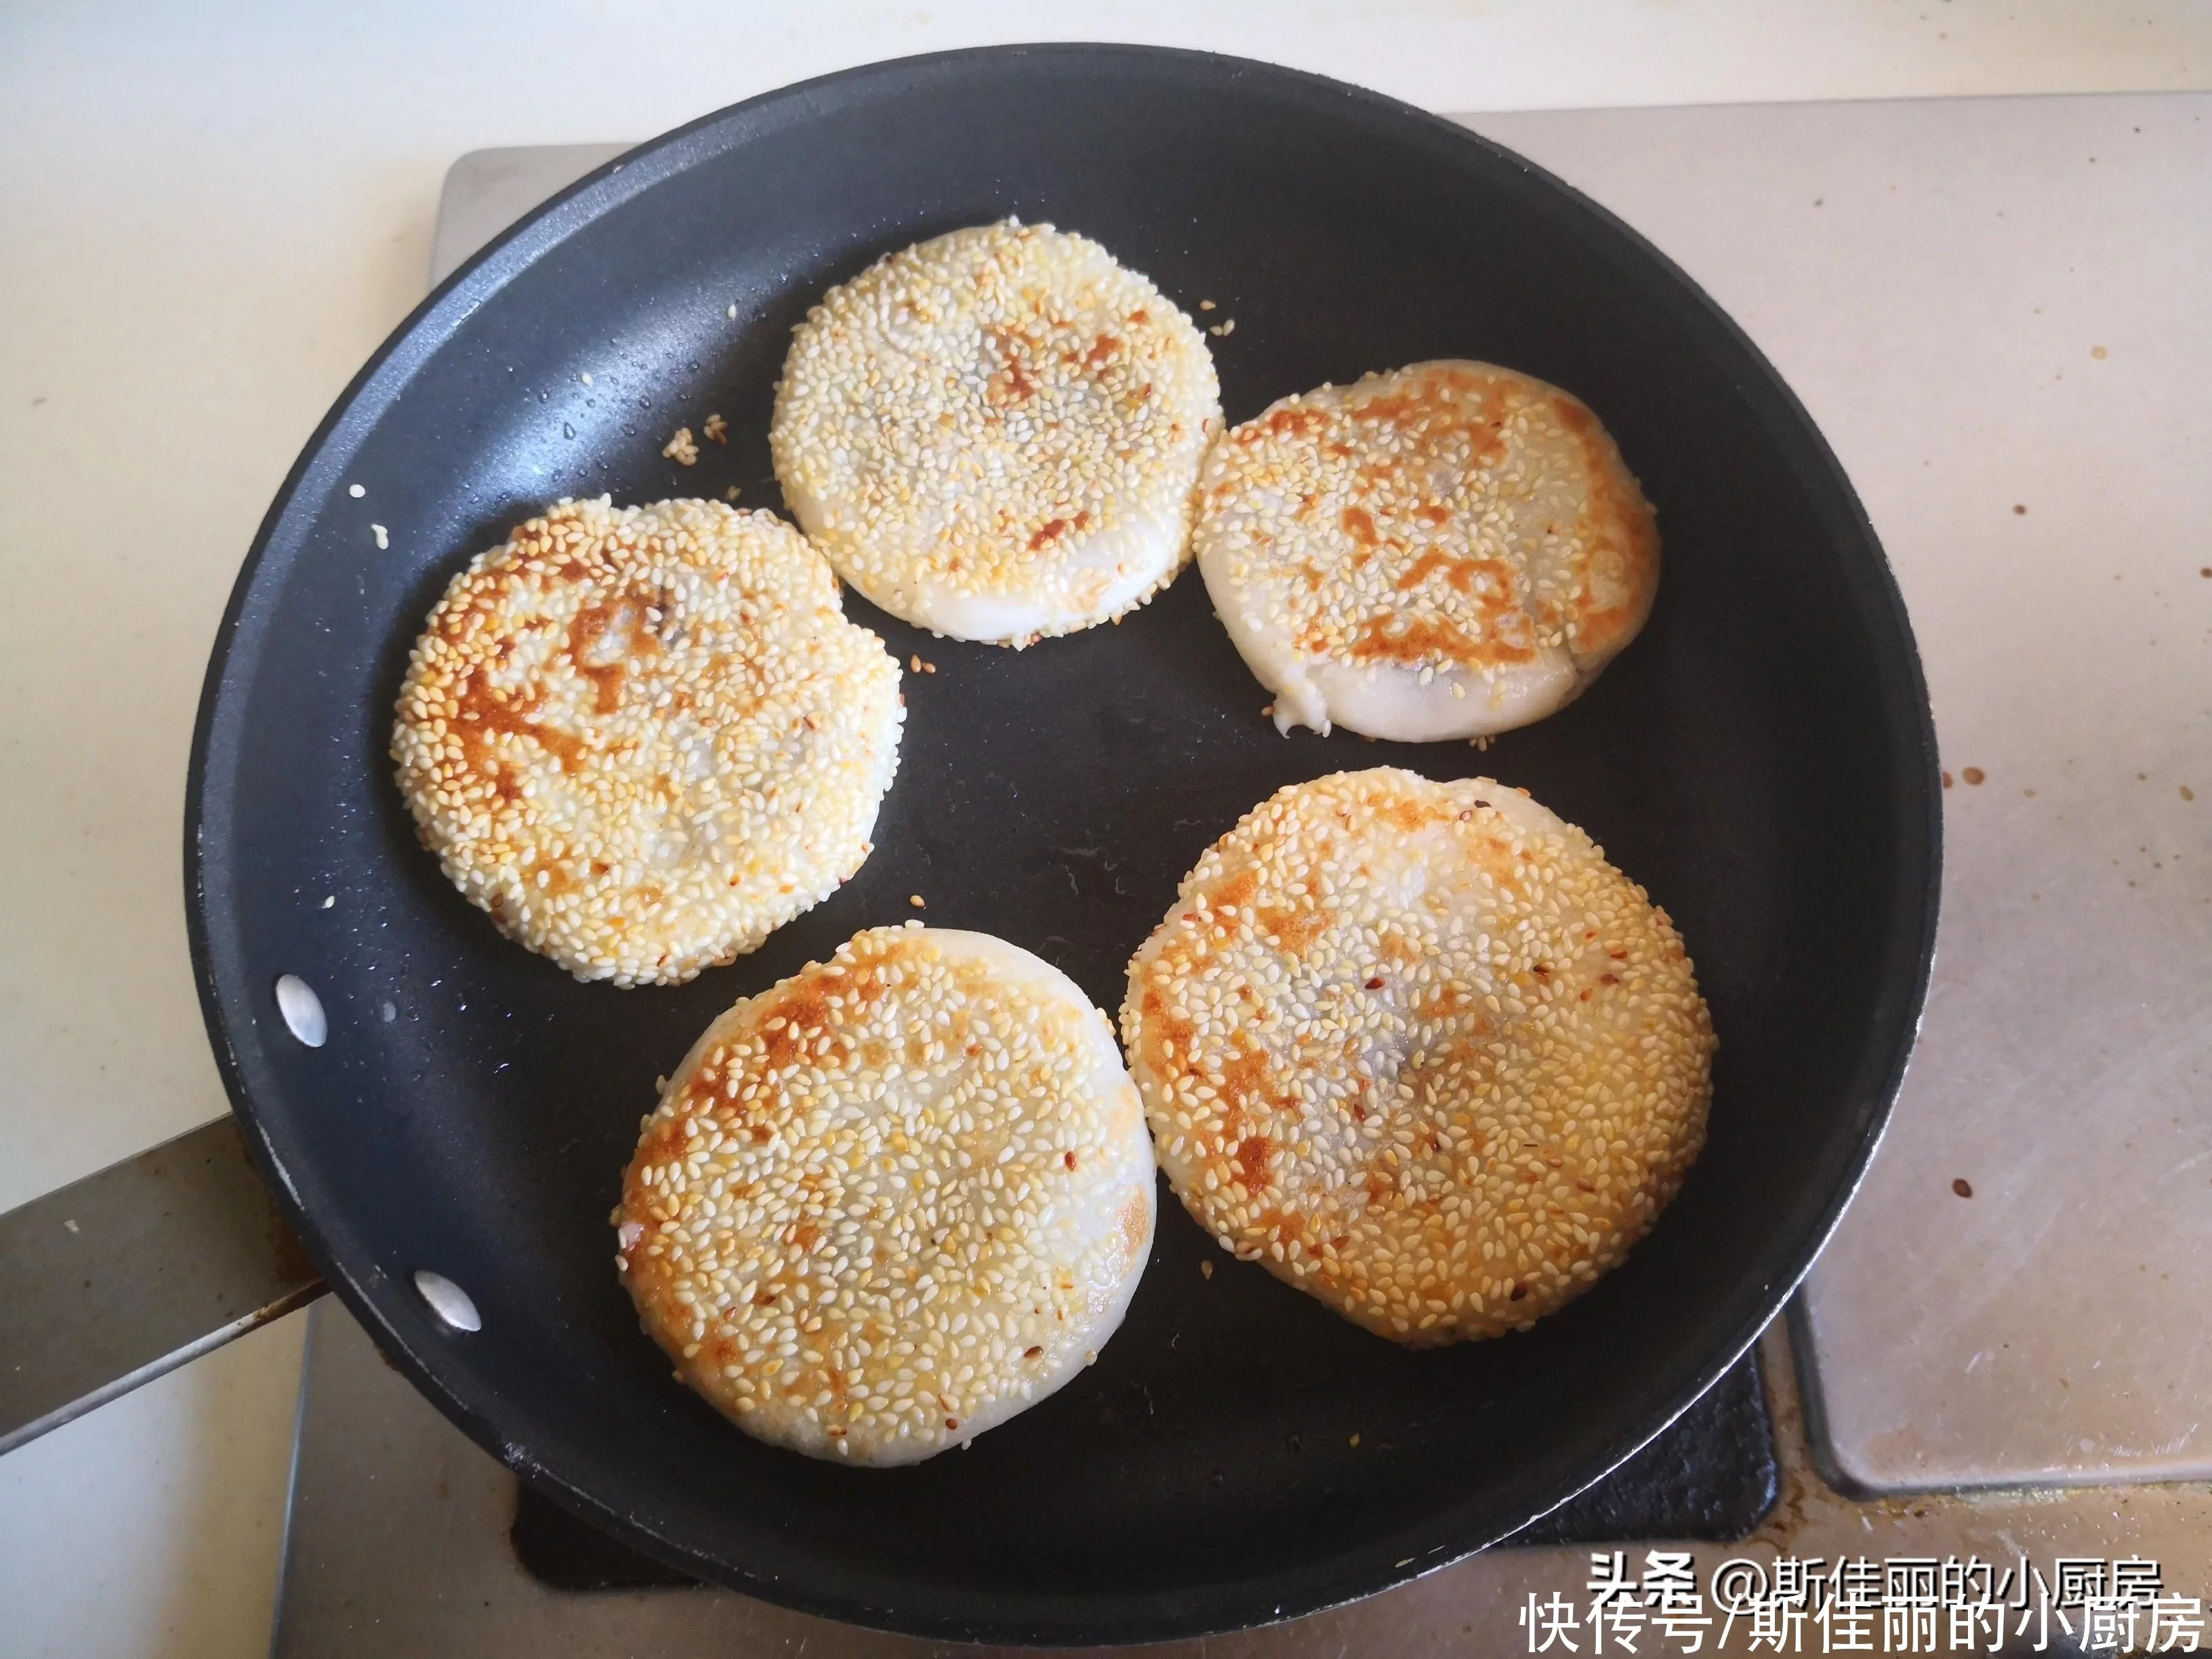
7. 烧热锅放入少许油, 将山药豆沙饼放入锅中煎,中小火煎熟,翻面后继续煎至金黄即可。
https://s3.ssl.res.360kuai.com/static/ef8b90d3f65bc2be.svg"), auto; width: 676px; max-width: 100%; border-radius: 3px;" />
×
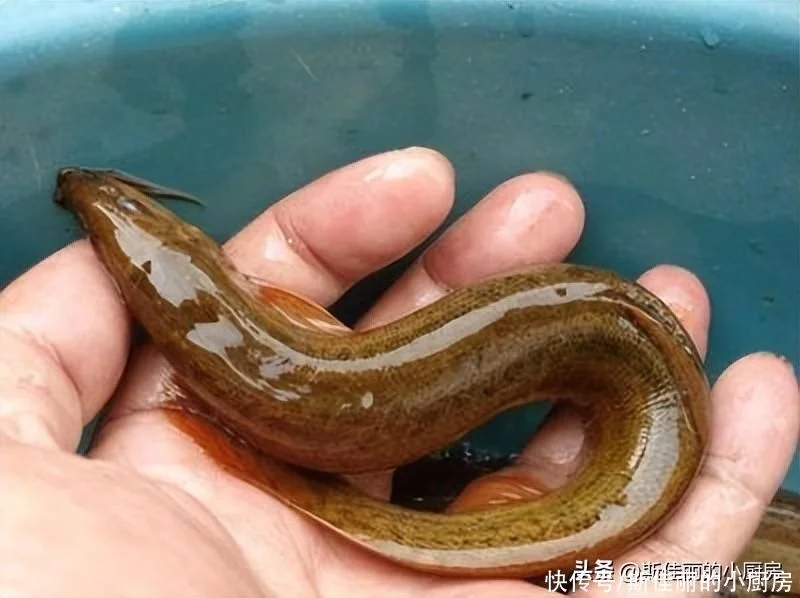
三、泥鳅,泥鳅被称为“水中人参” 高蛋白、低脂肪,富含蛋白质、多种维生素及矿物质,还有丰富的不饱和脂肪酸,常吃具有补肾壮阳、滋阴祛湿、强健筋骨、健脑补钙、健脾养胃等的功效,是老少皆宜食补食材。
https://s3.ssl.res.360kuai.com/static/ef8b90d3f65bc2be.svg"), auto; width: 676px; max-width: 100%; border-radius: 3px;" />
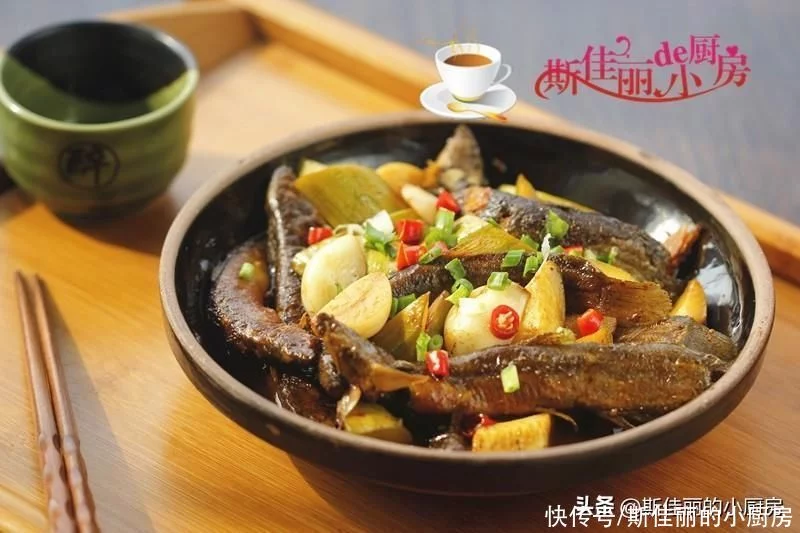
推荐菜谱【西葫芦烧泥鳅】
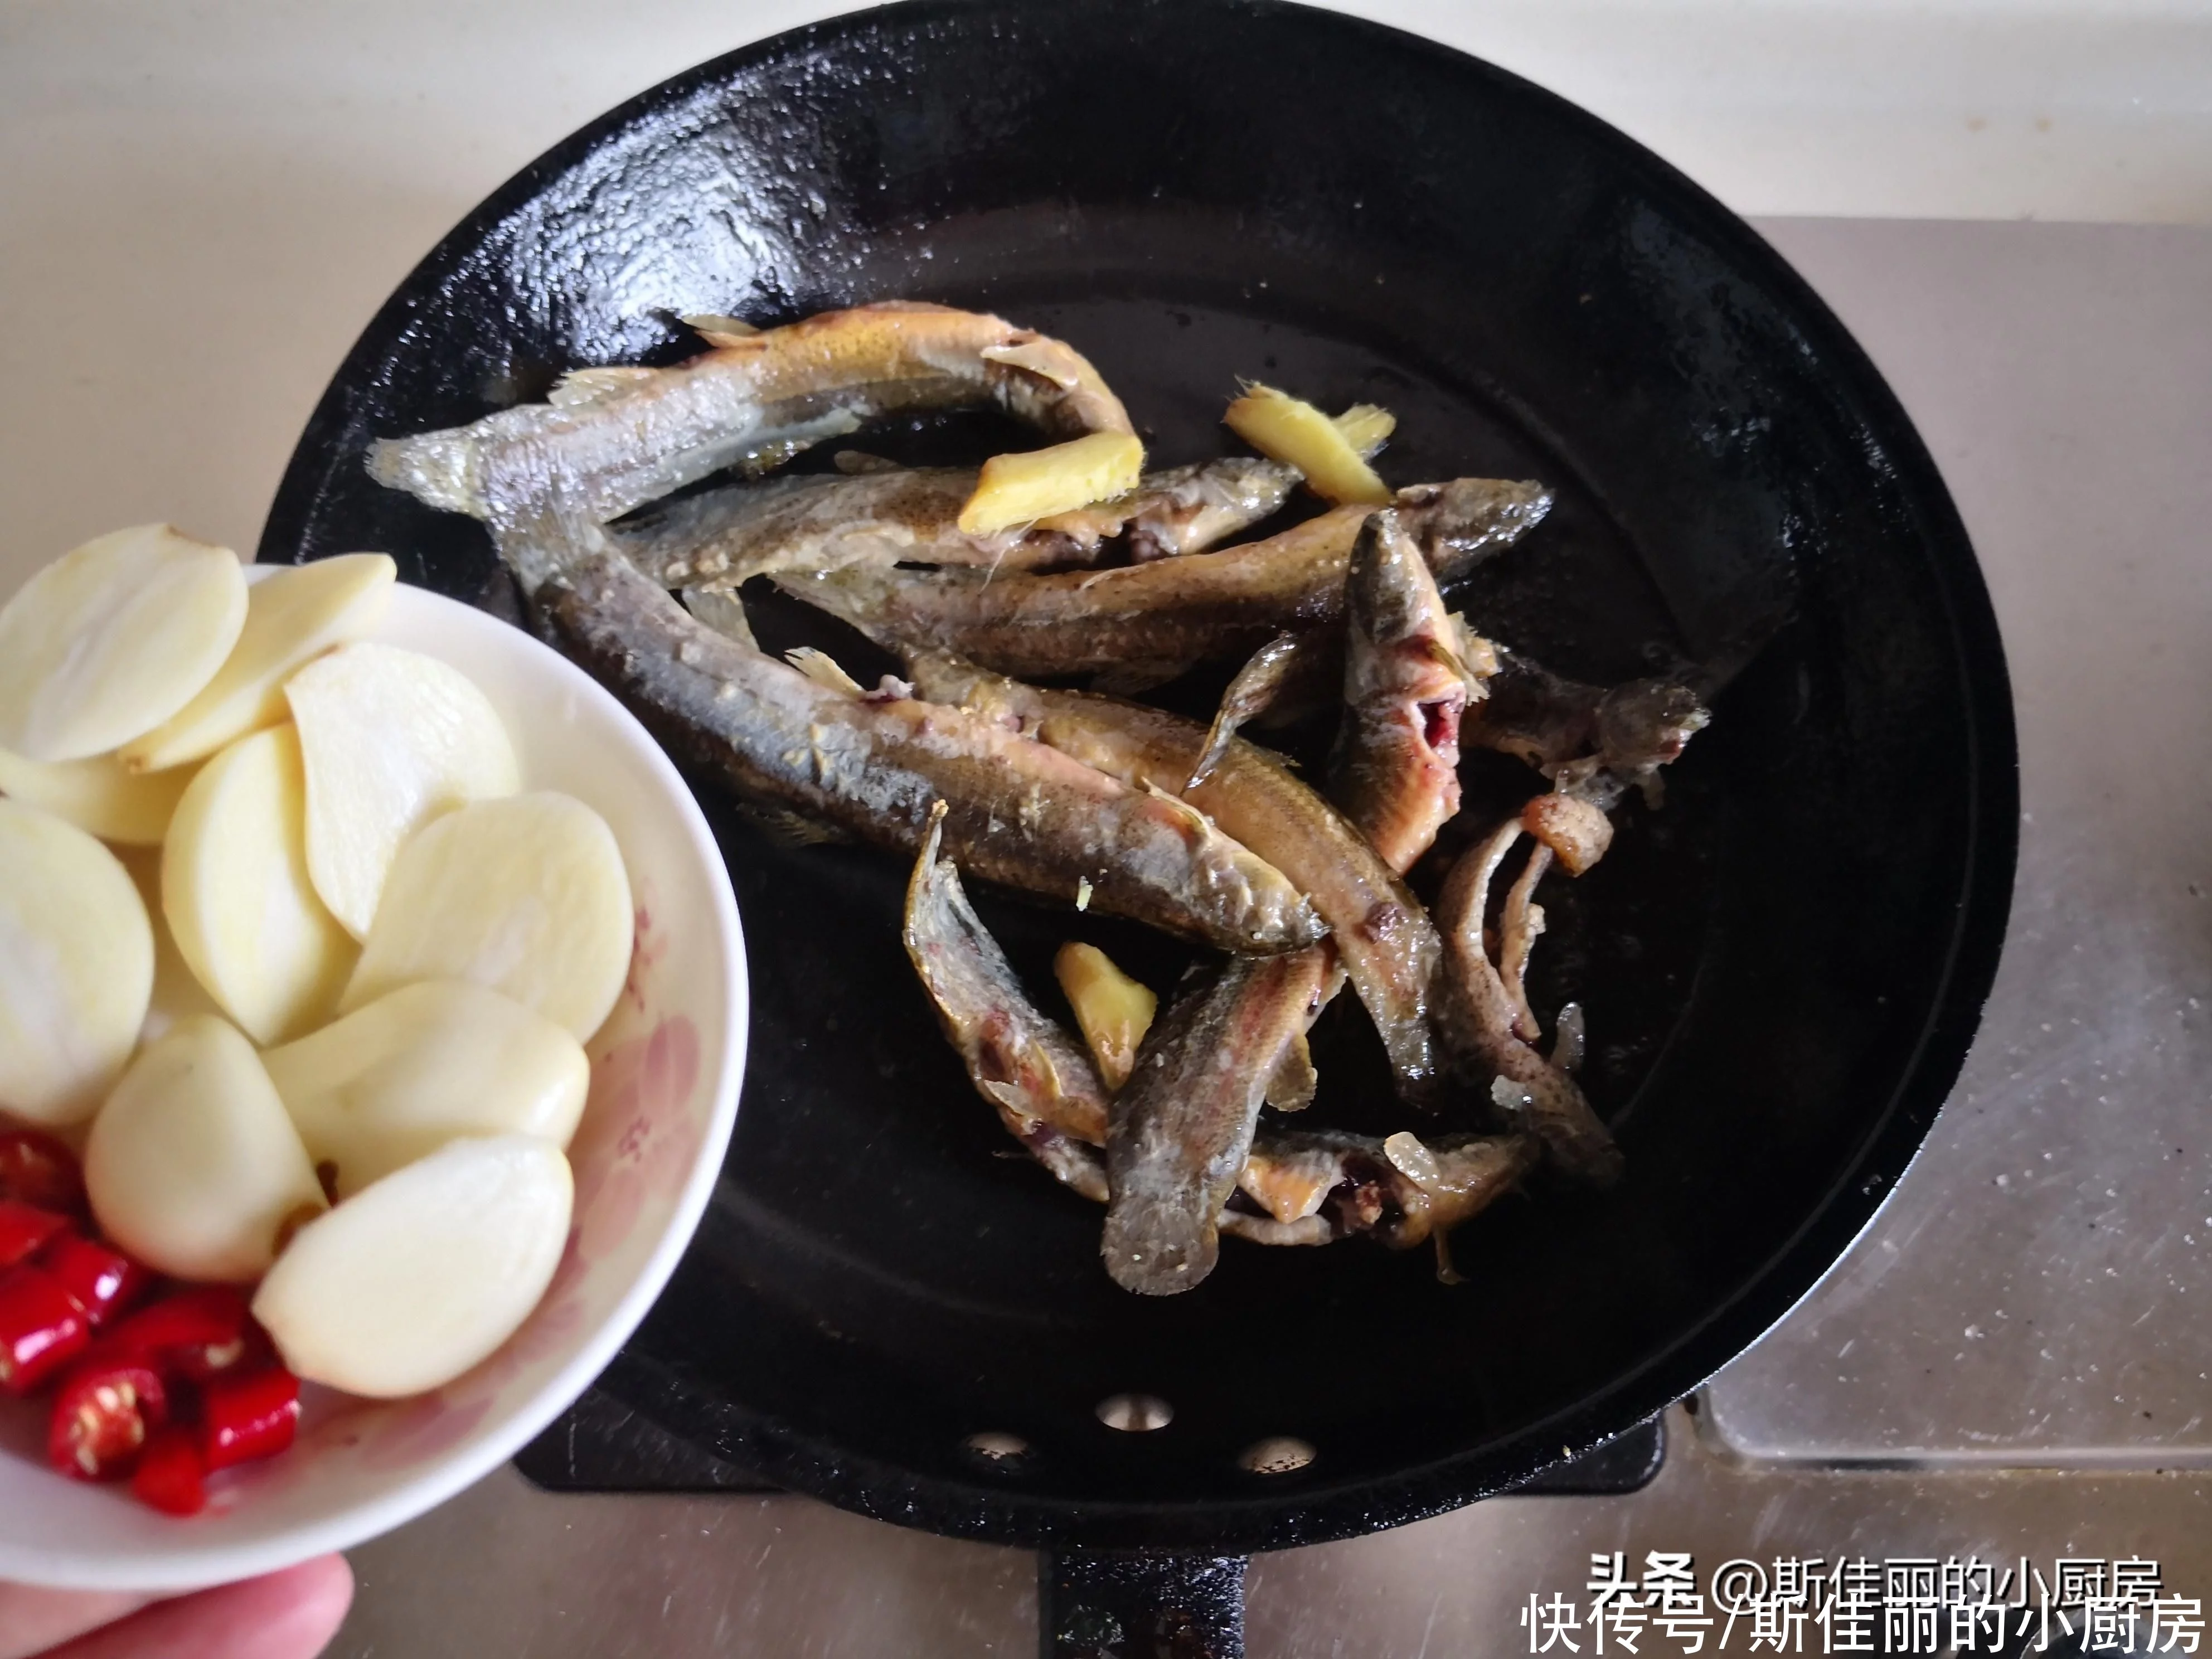
原料: 泥鳅 西葫芦 葱姜蒜 红椒 高度白酒 酱油 葱花 油盐
https://s3.ssl.res.360kuai.com/static/ef8b90d3f65bc2be.svg"), auto; width: 676px; max-width: 100%; border-radius: 3px;" />
×
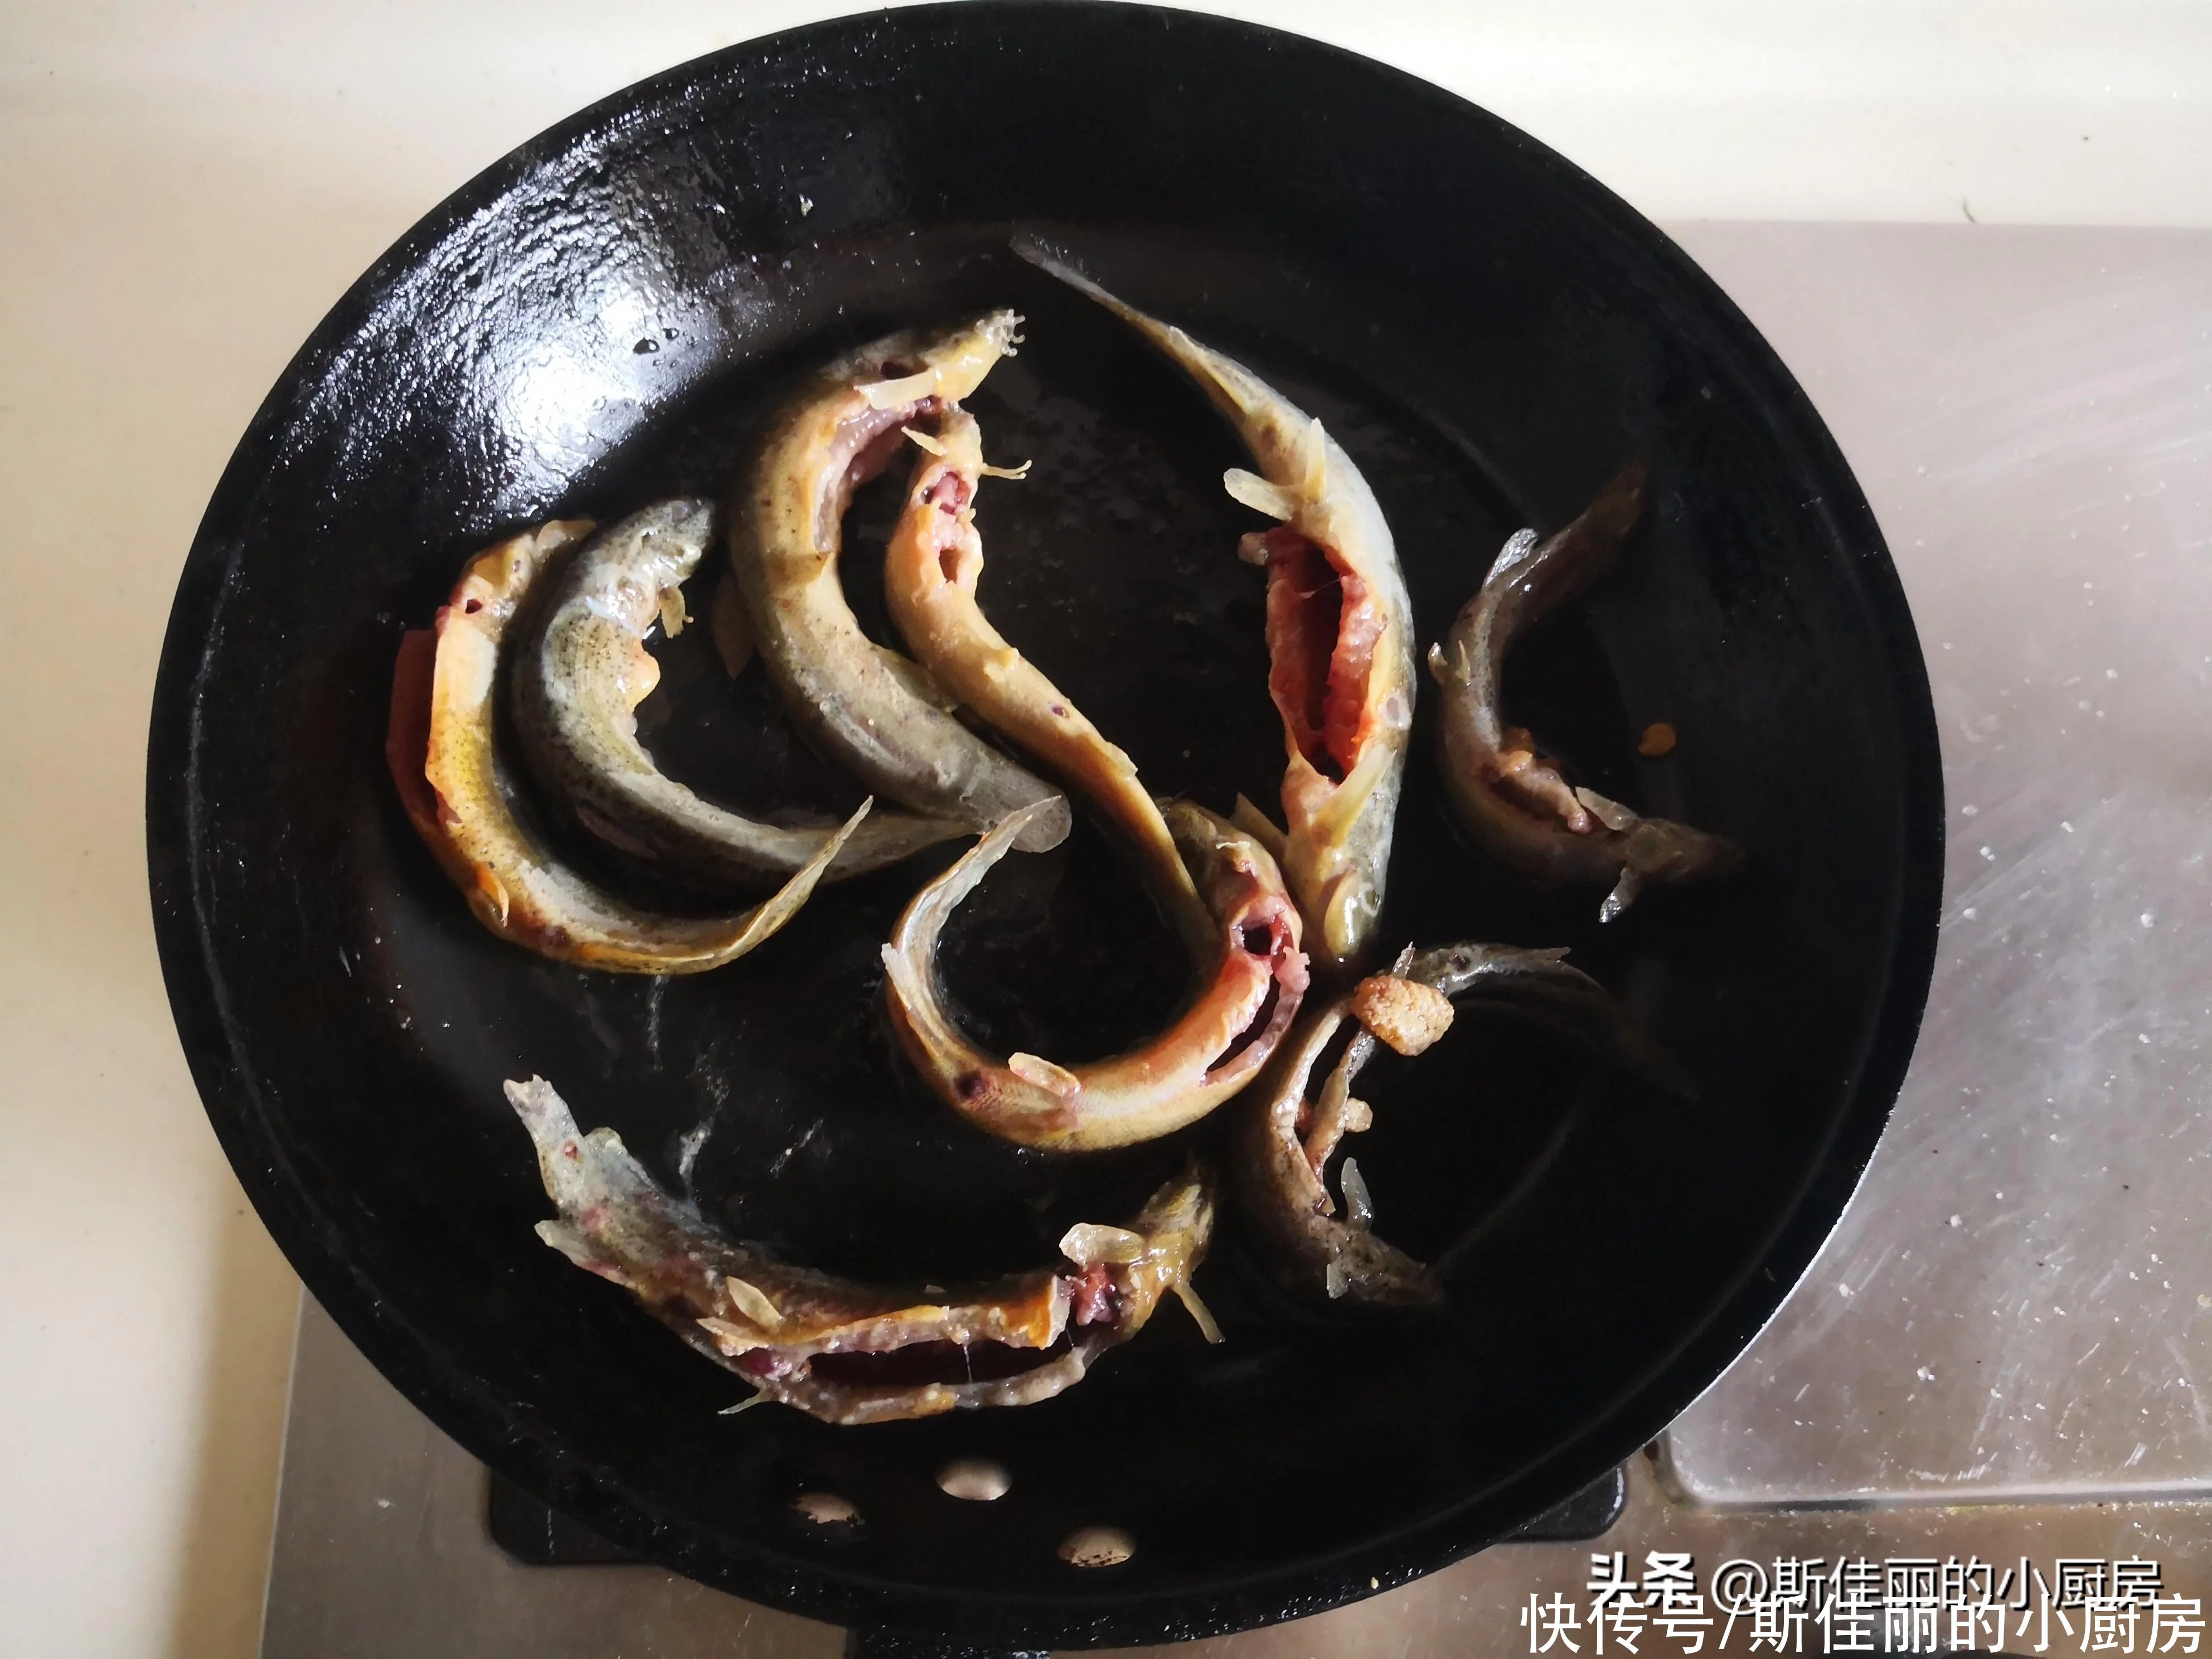
制作:1. 烧热锅放入适量的油,将泥鳅放进锅中去煎,将其双面都煎至金黄:
https://s3.ssl.res.360kuai.com/static/ef8b90d3f65bc2be.svg"), auto; width: 676px; max-width: 100%; border-radius: 3px;" />
2. 加入姜片进锅煸炒一下;
https://s3.ssl.res.360kuai.com/static/ef8b90d3f65bc2be.svg"), auto; width: 676px; max-width: 100%; border-radius: 3px;" />
×
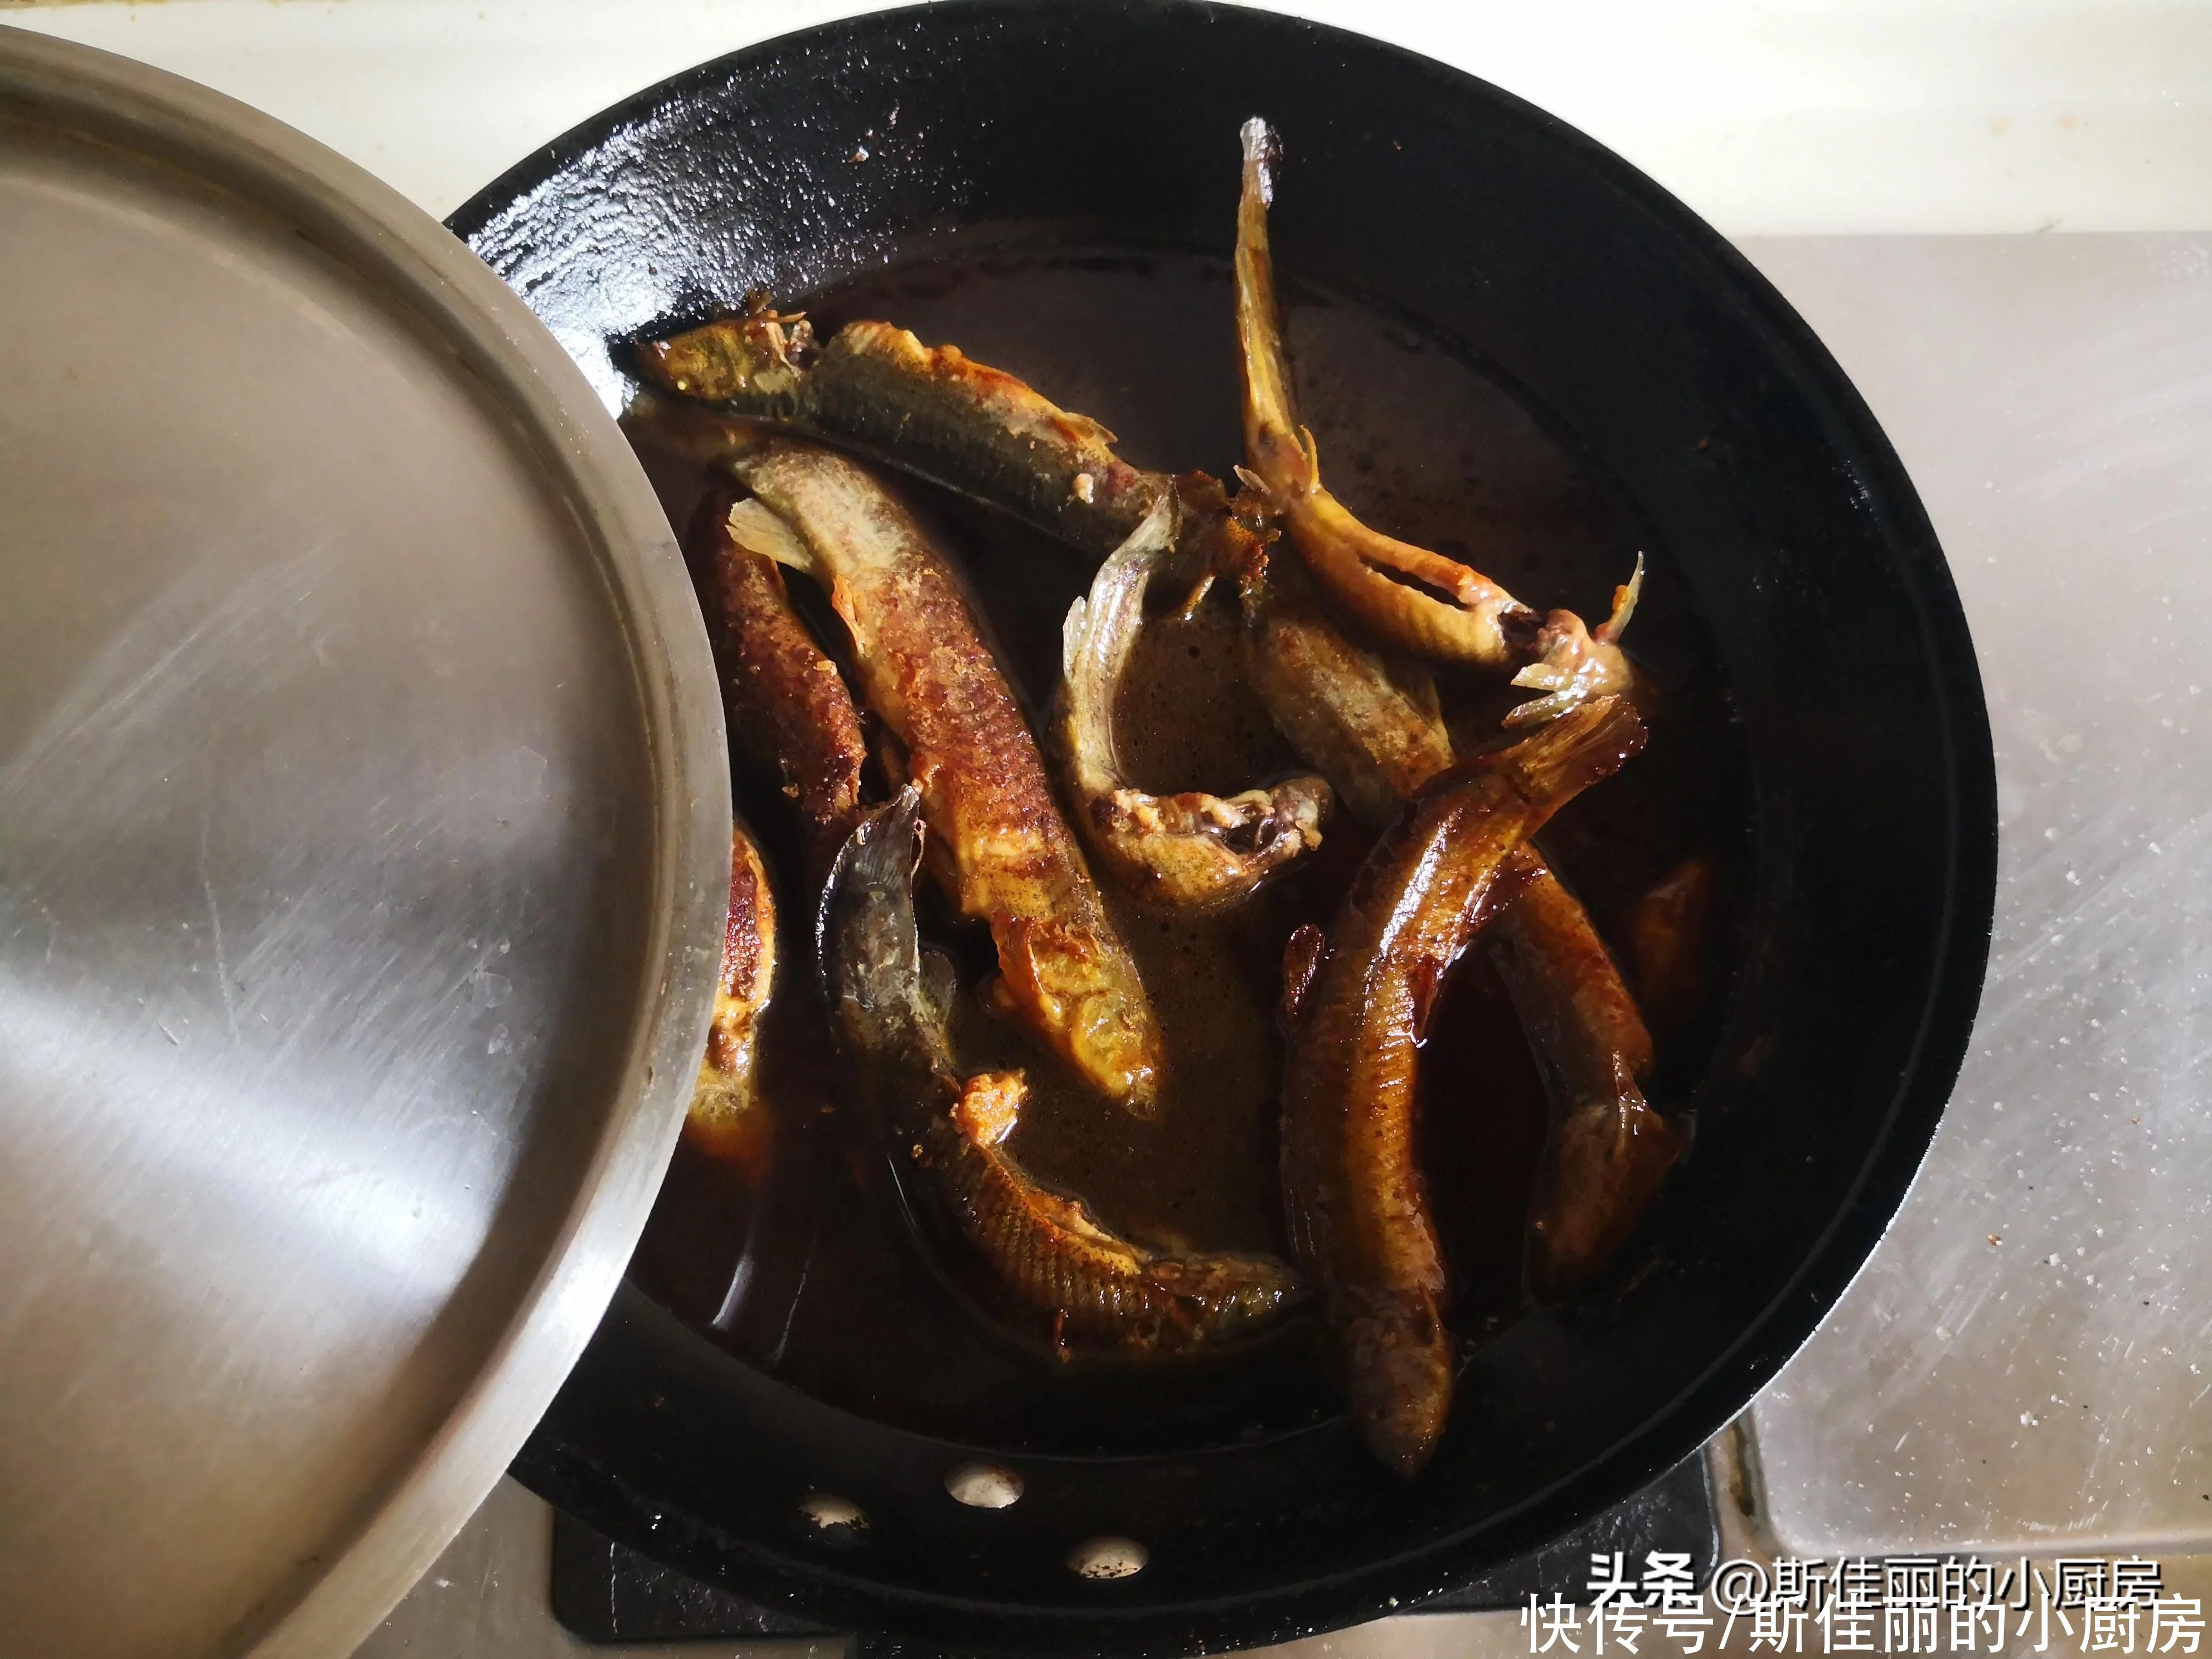
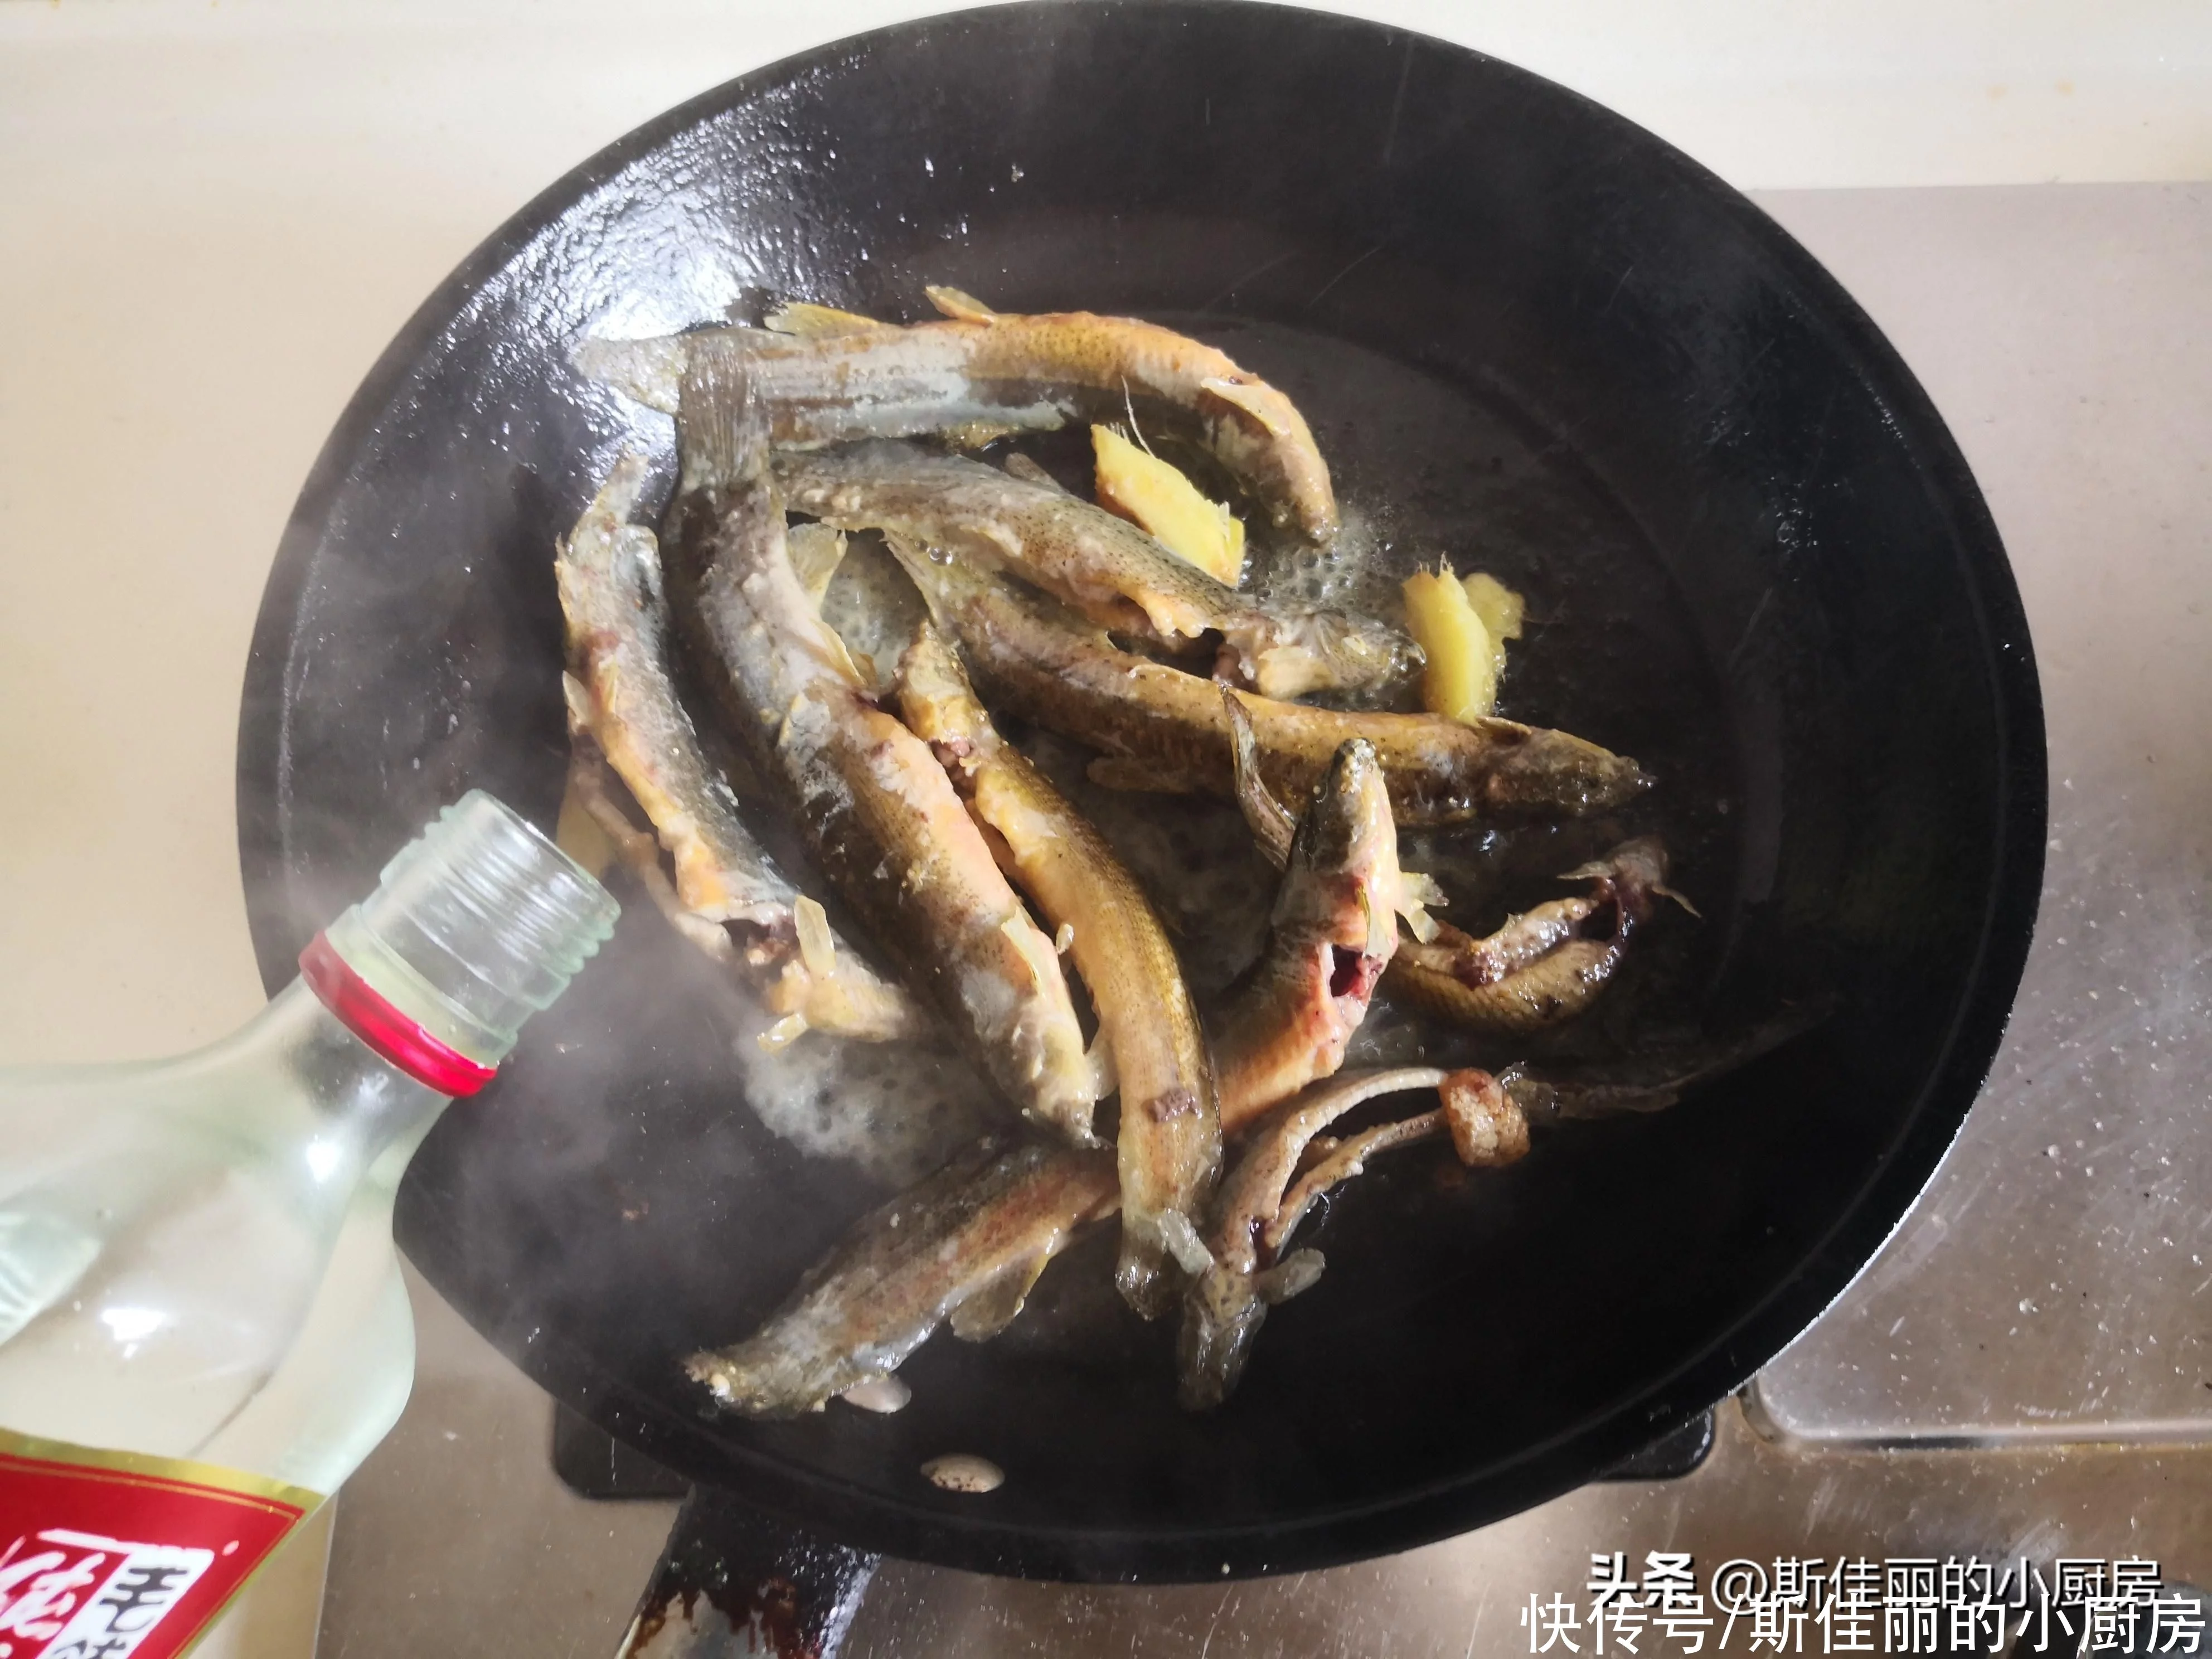
3. 烹入高度白酒和酱油翻炒均匀;
https://s3.ssl.res.360kuai.com/static/ef8b90d3f65bc2be.svg"), auto; width: 676px; max-width: 100%; border-radius: 3px;" />
4. 加入适量的水,加盖焖煮6分钟;
https://s3.ssl.res.360kuai.com/static/ef8b90d3f65bc2be.svg"), auto; width: 676px; max-width: 100%; border-radius: 3px;" />
×
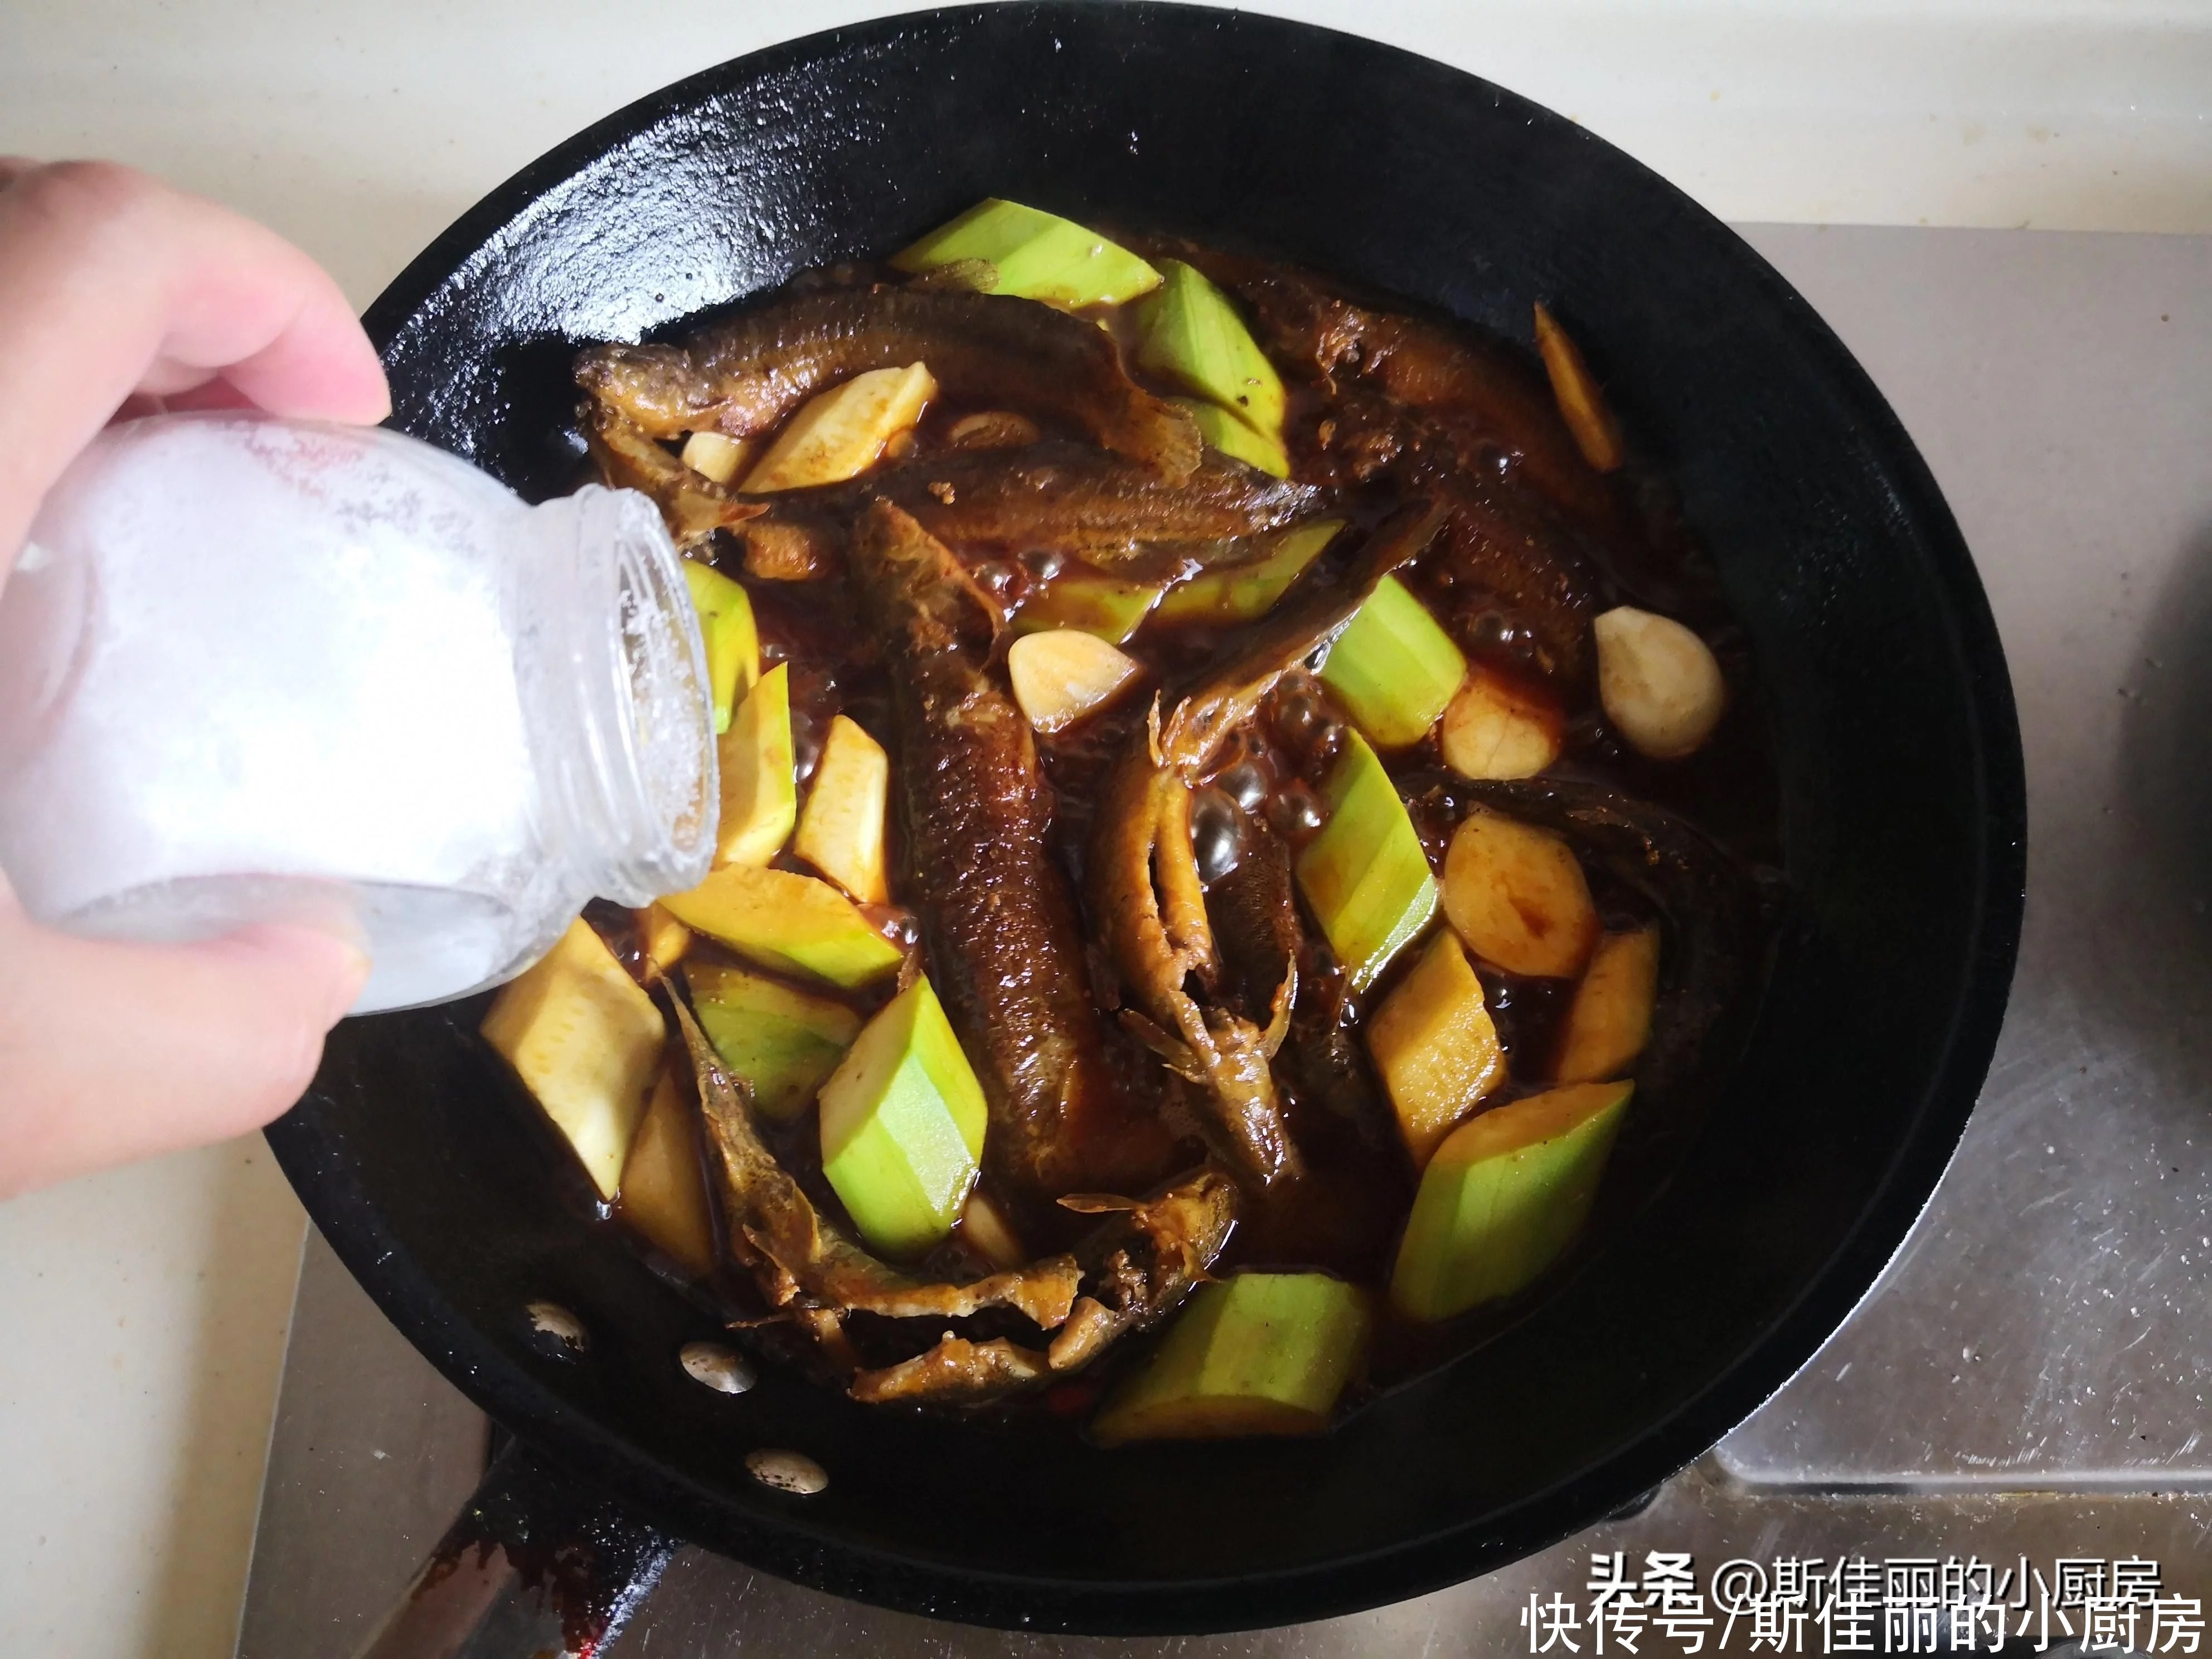
5. 加入西葫芦块翻炒均匀,再加入蒜瓣和红椒进锅继续焖煮3分钟;
https://s3.ssl.res.360kuai.com/static/ef8b90d3f65bc2be.svg"), auto; width: 676px; max-width: 100%; border-radius: 3px;" />
6. 最后加入少许盐翻炒均匀后,大火收汁,盛入盘中,撒入葱花。

